Product > Menu Book/Menu Category/Menu Item
To start building your menu, you can start with either Menu Books or Menu Categories. Depending on your preference, you can use Menu Categories for the main structure, or add Menu Books for an extra layer of organization.
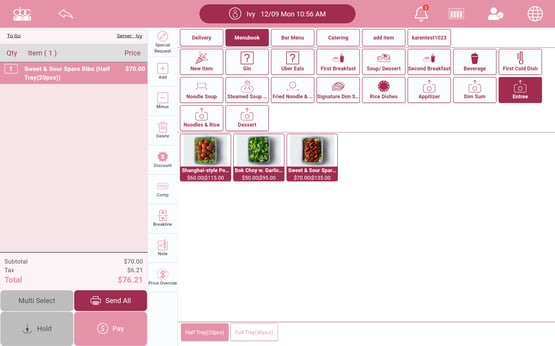
Menu Books
You can use Menu Books to create a Breakfast, Lunch, or Dinner Menu. You can also create special occasion Menu Books, such as Valentine's Day Menu or Christmas Menu. Learn more

Menu Categories
Step 1: Input Basic Information
- Create your Category: You can display item names in both English and Chinese. You can abbreviate longer names to ensure they fit on receipts. If your POS uses only one language, enter the same name in both columns.
- For example, to display "Hot Pot Soup Base" in English only, type "Hot Pot Soup Base" in both the English and Chinese name fields.
- Choose where to display the menu category: Ensure you toggle the appropriate switches to display the menu category on specific order platforms, such as POS, Self-Order, Online Order, or QR Order.
- Active: switch on to display this item on POS
- Open Item: switch on to allow the server to enter a custom name and price
- Sold Out: switch on to note an item as unavailable
- Self Order: switch on if this item is available for the self-order kiosk order
- Online Order: switch on if this item is available for the online order
- QR Order: switch on if this item is available for the online order
- (Optional) Customize your icons by clicking the teal box on the right

Step 2: Select Your Grouping
- Menu Book: Add your menu category to a Menu Book. You can also quick add a new Menu Book
- Sales Category: The selected sale category will determine what tax will apply to all the menu items in this category. If you have not created one yet, you can use the default sales category Learn More

Advanced Settings:
- Full Screen Mode:
- If selected, the option to choose dish modifications will show up as a full screen on the POS system
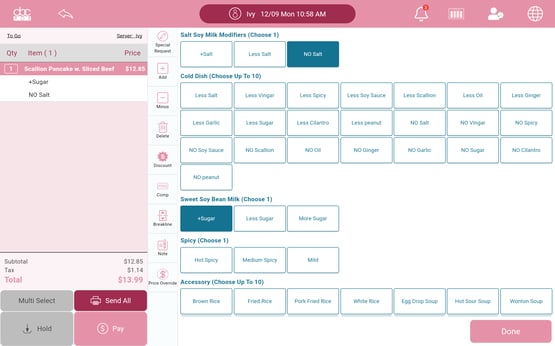
-
- If unselected, the dish modifications will only show up on the bottom of the screen
- Printer Setting:
- Attach one or multiple printers from the dropdown and it will apply to all the menu items under this category.
Menu Items
Step 1: Input Basic Information
- Creating a Menu Item under a Menu Category: If you create a menu item under a specific category, the Grouping will already be inputted. Edit as needed.
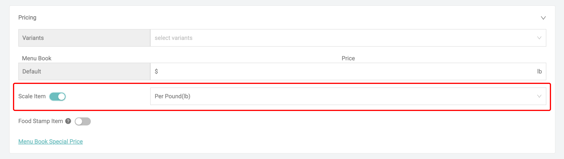
- Pricing: You can adjust your prices based on variant groups and menu books. You can also note if this is a Scale Item.
- Variant Groups: You can select a variant or create one in this section. (Ex. Small, Medium, or Large options for the item)
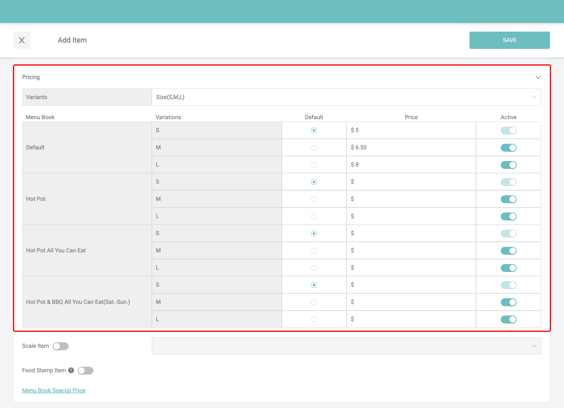
-
- Menu Books: Select 1 or more Menu Books and indicate the item price for each
- Menu Book Special Price > Select Menu Books > Input prices
- Menu Books: Select 1 or more Menu Books and indicate the item price for each

-
- Scale Item: Switch on if the item is a weighted menu item (Ex. price per pound)
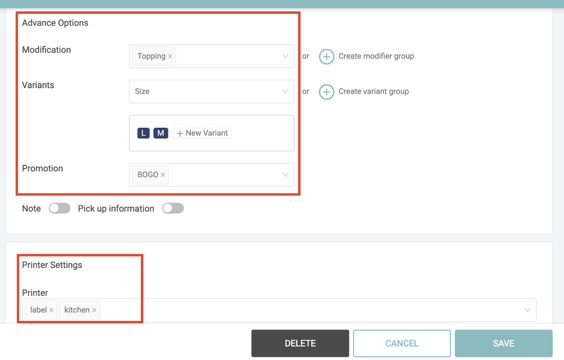
- Advanced Settings
- Modification: select modification for the specific item Learn More
- Promotion: select the promotion that applied to the item.
- Printer: choose the printers that you want to send the item to.

Video Guide to add, delete, and edit a Menu Item
For further assistance, feel free to reach out to your sales representative or contact the ABC technical support team at +1-718-878-666.