After receiving your POS package, please follow the steps for the essential settings of your restaurant POS.
Step 1. Select order types and Home features available in your store
After login the BO, Go to POS Settings. Afterward, click the "Customization" tab to see the Order Types and Home Features Settings of the selected branch.
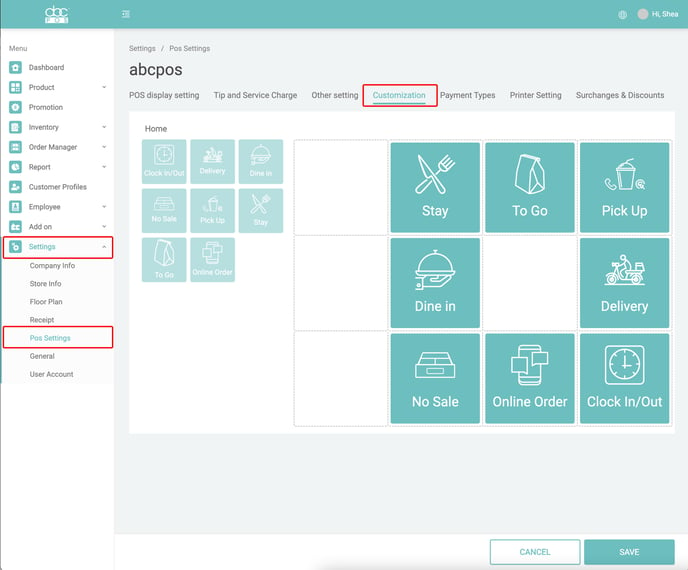
The first setting needed is active Order Types and Home Features. They are the order types and Home Features available in the branch. The order types supported currently are: Dine In, Stay, To Go, Pick Up, Delivery and Online Order. The order types supported currently are: Clock In/Out and No sale.
 Step 2. Customize your POS home screen
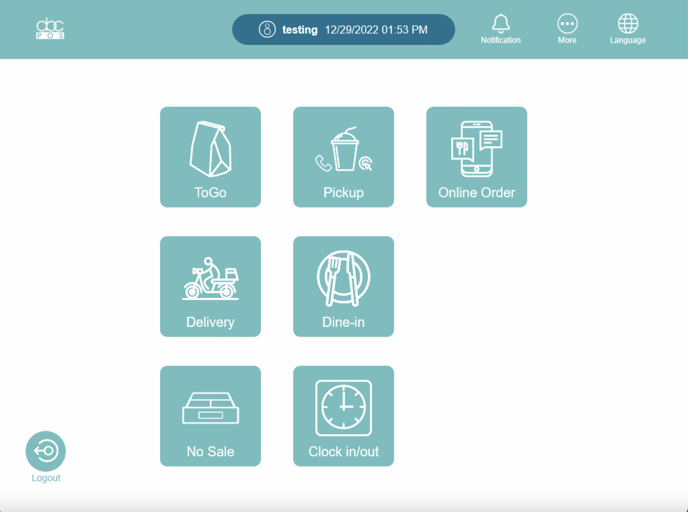
After active order types are selected, you can then customize the Home screen of your POS terminals.
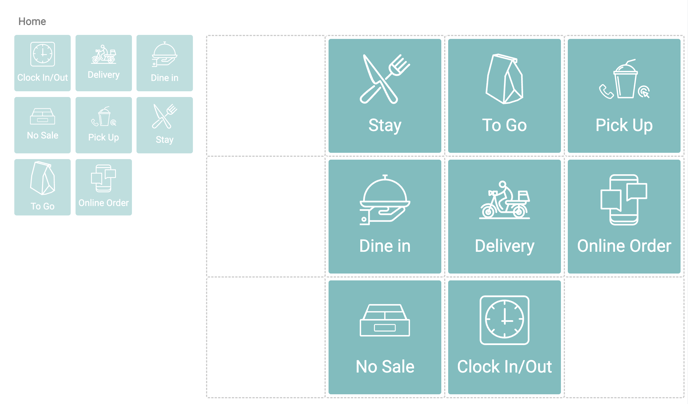
The icons available are listed on the left. Click them to put them on the Home screen. Selected icons show on the right in the grids. In the 4x3 grids, you drag and drop icons to place them so that the icons are placed according to your habit.
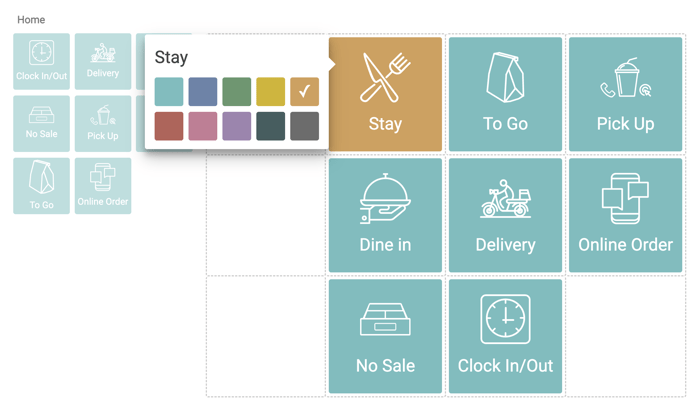
Clicking an icon allows you to change the button color. After finishing, click the SAVE button to save the settings. And you will be able to see your customized home screen on POS.
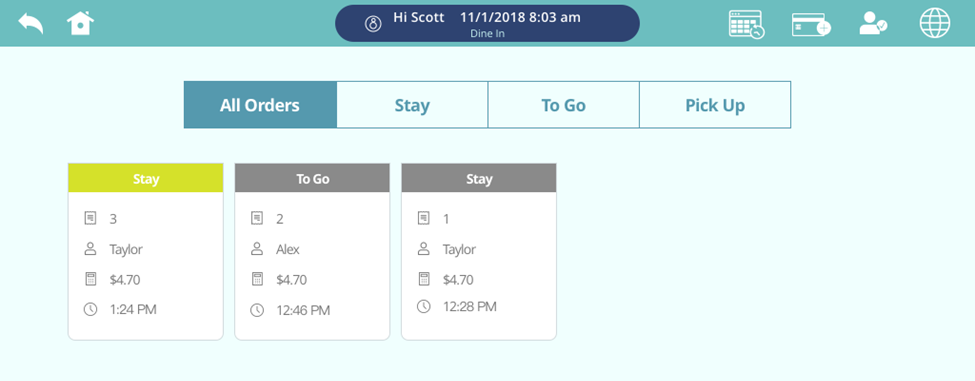
Step 3. Information on POS Order List screen
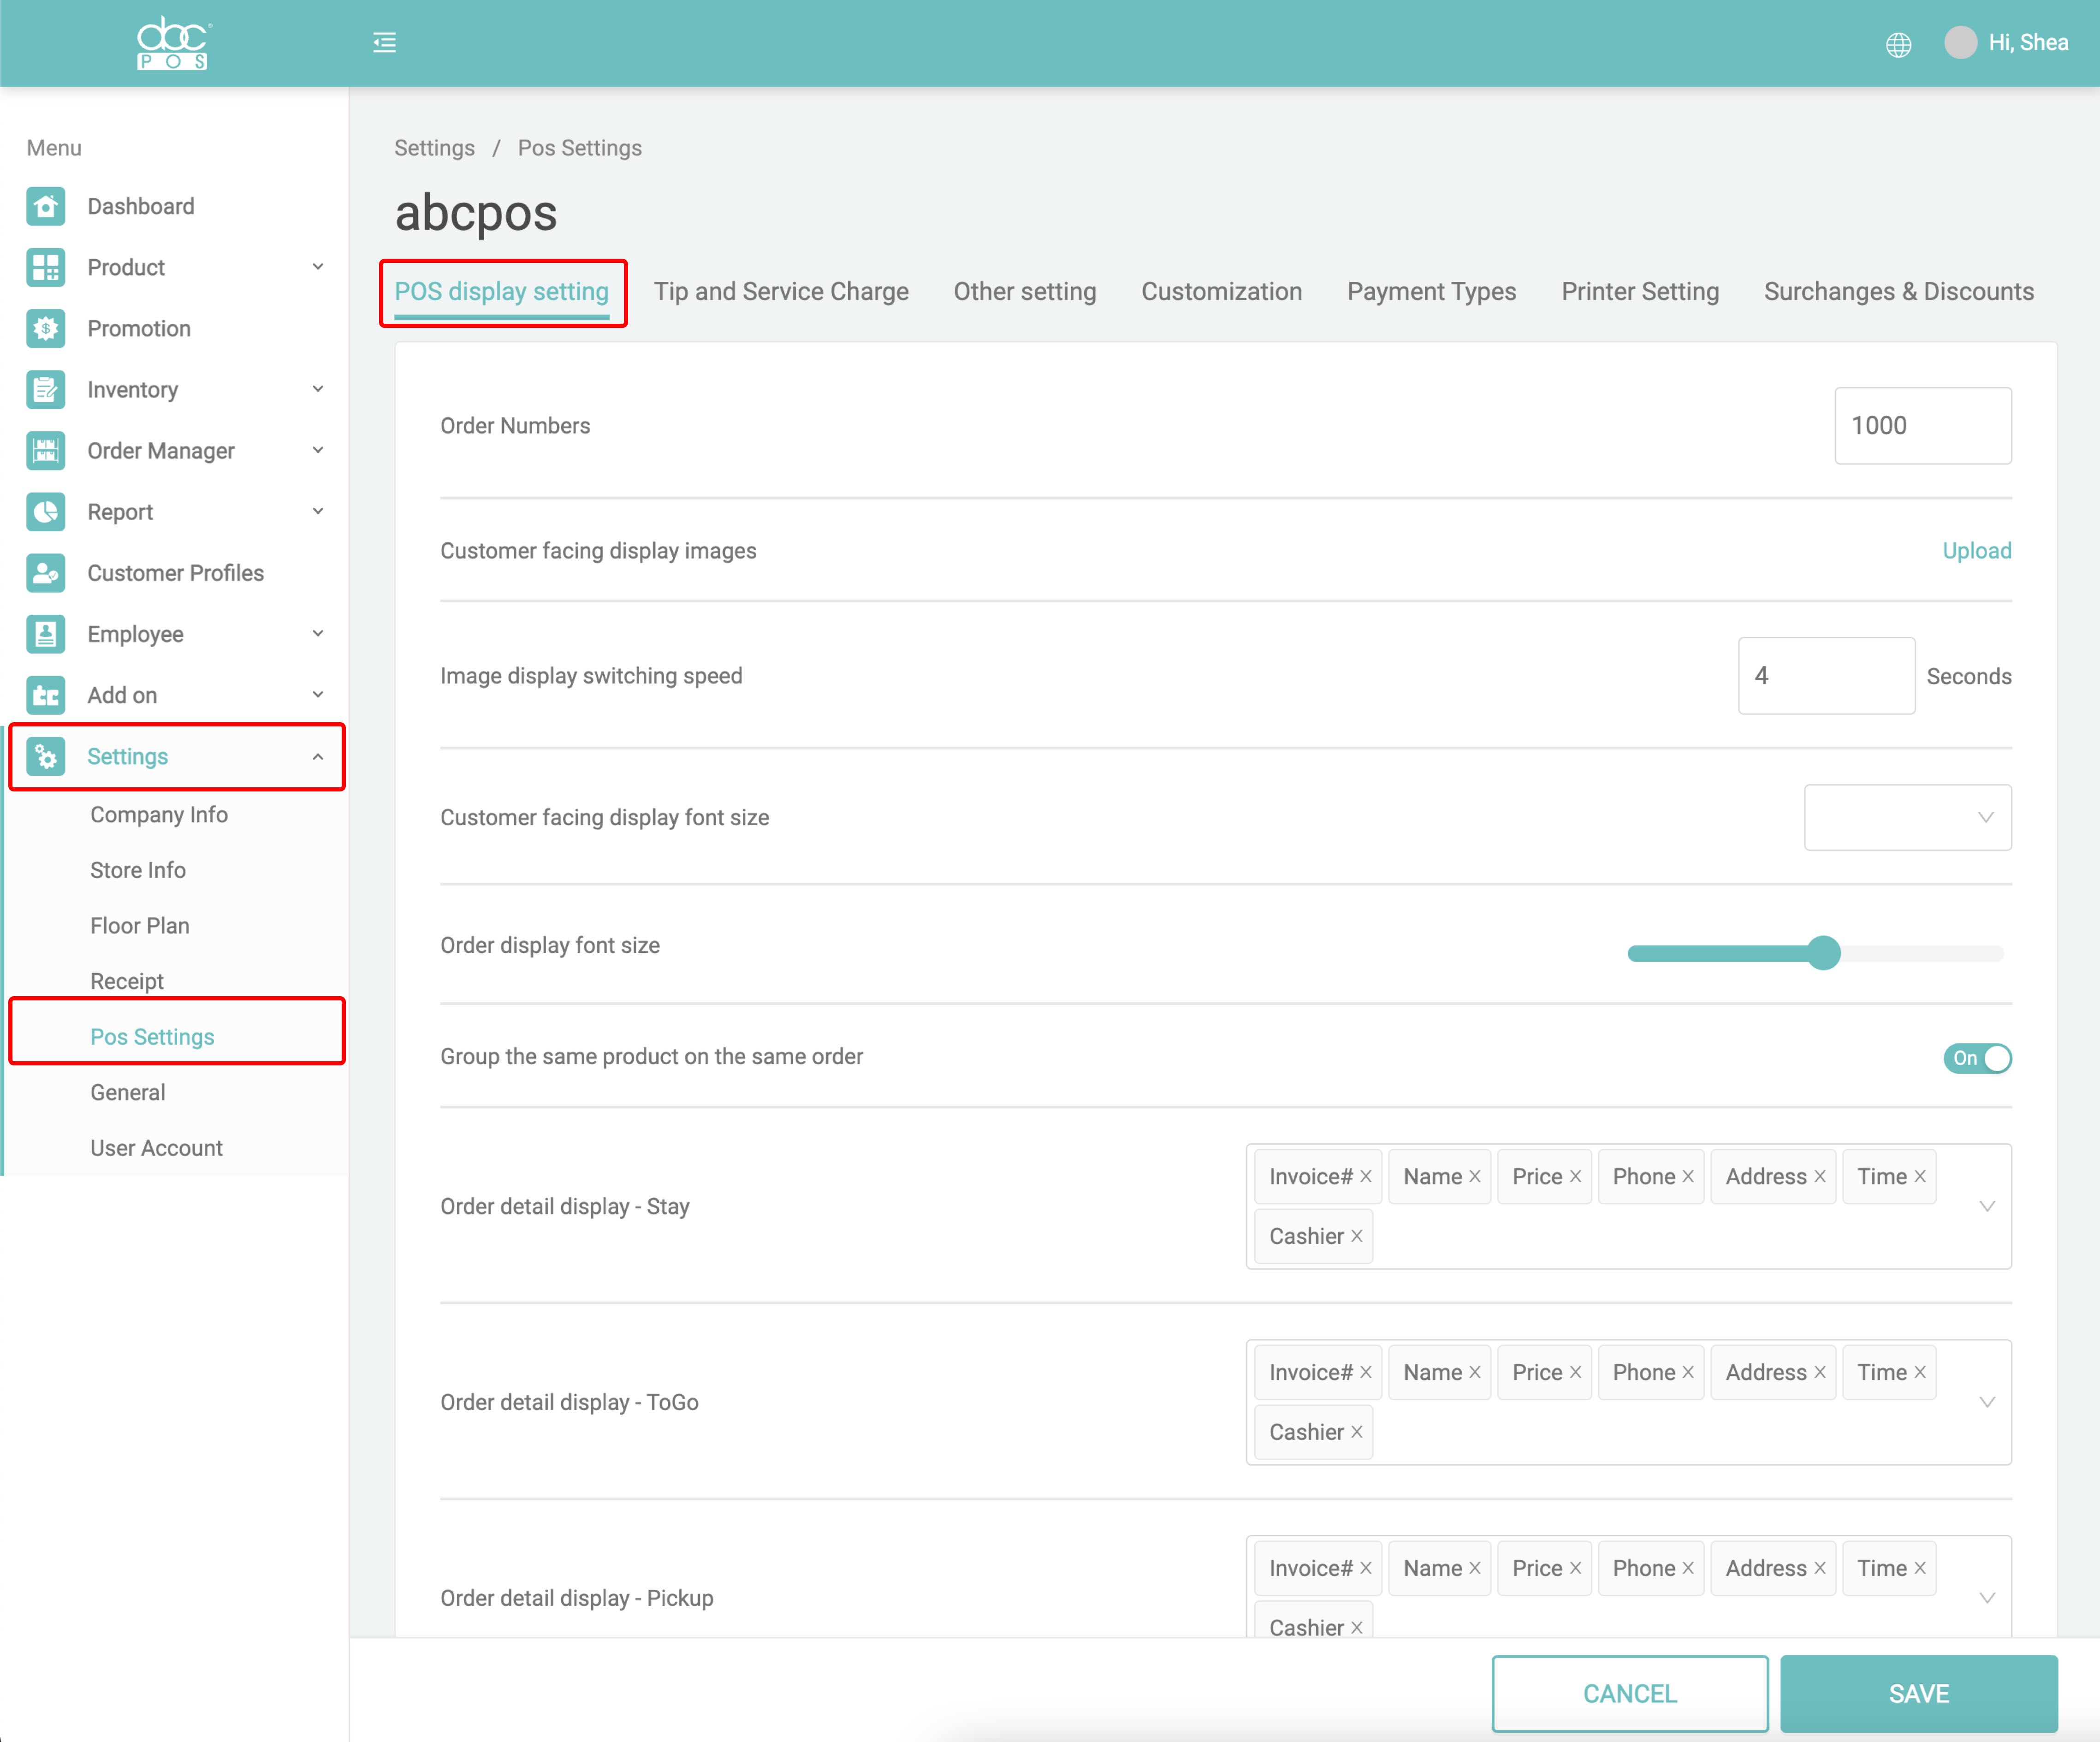
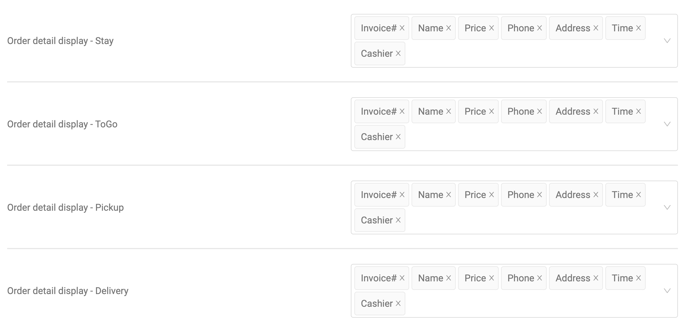
For each order type available, you can choose the important information about the order to show on the POS Order List screen. Then, you are able to see the information displayed correctly on the POS Order List screen for each order type.