
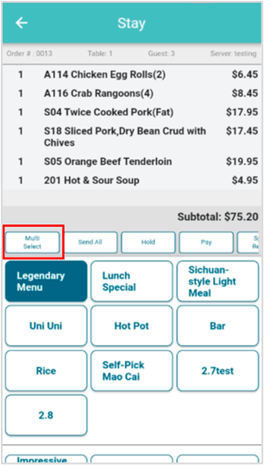
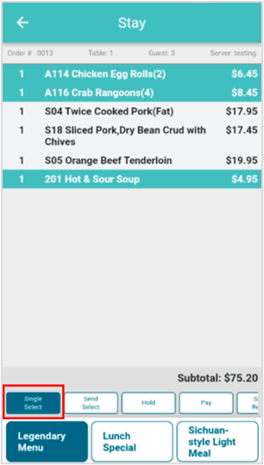
Multi-select or single-select: when you need to choose more than one item,tap “multi-select”,then select multiple items, these selected items’ backgrounds will be colored, you can take the same action for those selected. When you tap “multi-select”, the button will switch to “single-select”.

Send all, Send select or Send: you can send the order to the kitchen for preparation when the guest has been ordered. Once the items are sent to the kitchen, these items’ backgrounds will be colored. If a table has an open check with all sent items then the table will turn to orange on the table screen.
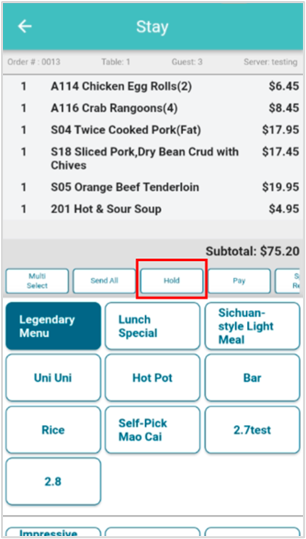
Hold: the button is used when you added items to a check but aren't ready to send them to the kitchen yet. This feature is useful if you just placed an appetizer order, but don't want to re-ring in the entree later. Or if part of the table orders and then the rest of the table asks you to come back to finish taking orders later.
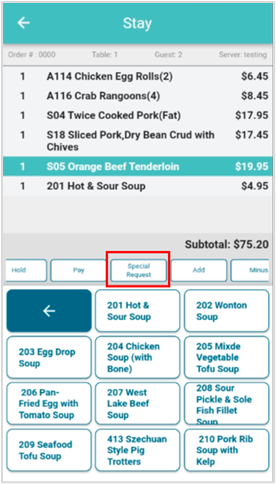
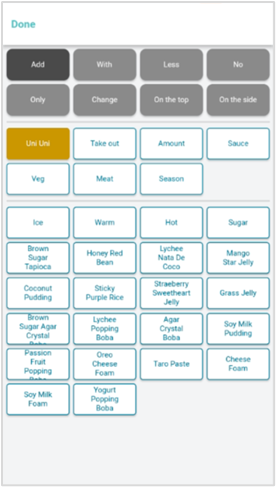
Special Request:an employee has the ability to add special instructions or notes called Special Requests to an item. These notes can be used as instructions for the kitchen, as allergy notifications, or as a specific modifier that might not yet exist in the menu.

Add,Minus or Delete: when you select the item on the order screen, you can add, minus or delete the item.

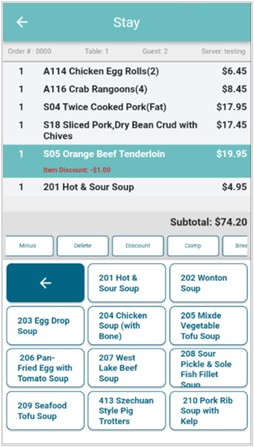
Discount (in order screen before sent order): you can configure discounts that reduce the price of a check or an item by either a specific currency amount or by a specific percent. The currency amount or percent value is either configured in the discount, or set by the restaurant employee when they apply the discount. You can either discount the whole order or single item before sending the order to the kitchen.
Discount whole order: do not select any item before discount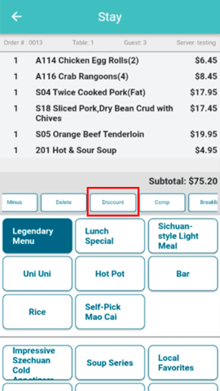
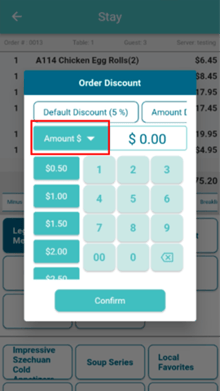

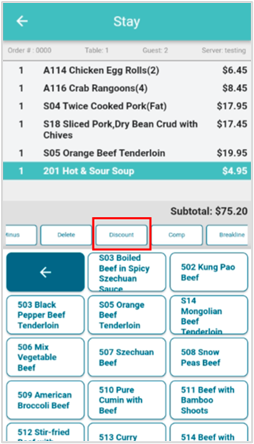
- Discount single item: select at least one of the items and then discount

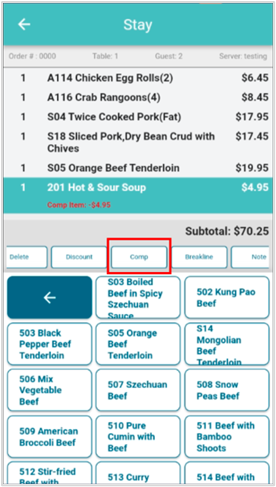
Comp:a comped meal is a free meal at a restaurant. The word “comped” or “comping” comes from the word complementary.” *Note: this function is only available when you select at least one item.
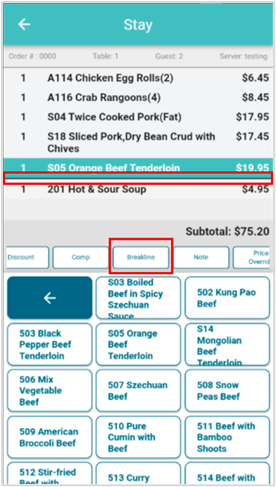
Breakline: you can add breakline when you would like to order a new item different from the treated item. *Note: this function is only available when you select at least one item.
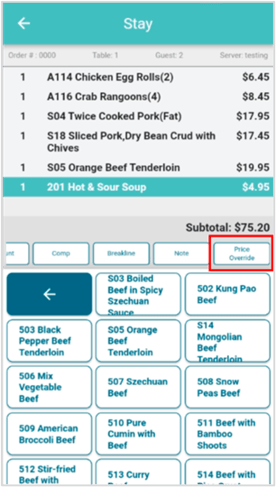
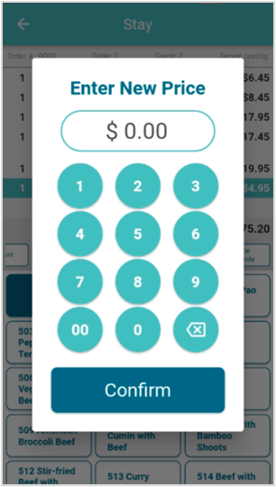
Price Override: a price override is a feature of a retail management system which allows an authorized person to change the automated price of a product or service, in order to apply a discount. Price overrides occur for a variety of reasons. One common reason is to discount damaged goods. Another is employee discount and discounts given to other groups. *Note: this function is only available when you select at least one item.

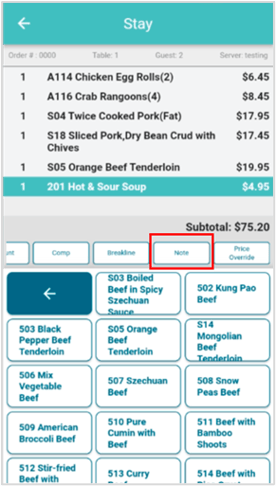
Note: you can remark some information for your choice of item. *Note: this function is only available when you select at least one item.


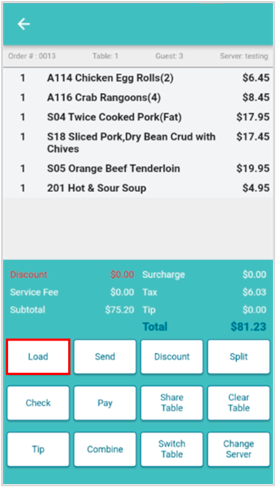
Load: as an employee, you can load the order which is your open table to review the order’s details.
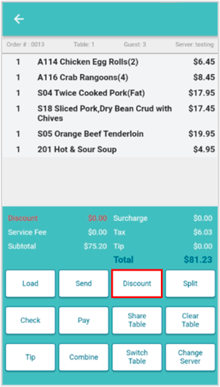
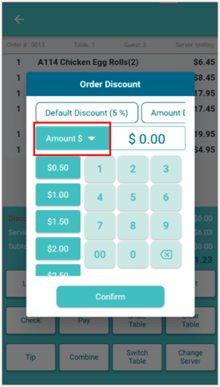
Discount (in order screen after sent order): you can configure discounts that reduce the price of a check by either a specific currency amount or by a specific percent. The currency amount or percent value is either configured in the discount, or set by the restaurant employee when they apply the discount.
*Note: you can only discount the whole order after sending the order to the kitchen.

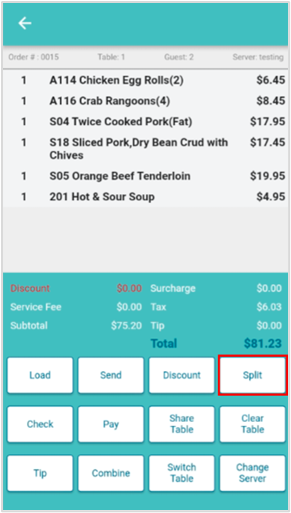
Split: bills can be split in different ways depending on the needs of customers. Users can split evenly, by dish or custom.
- Split Evenly - The number of default split checks are the guest number.
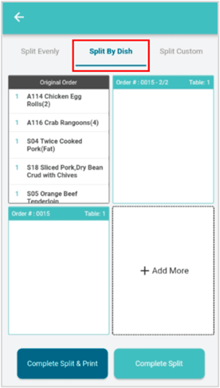
- Split By Dish - The number of default split checks are two. You can split the order by dish.
- Split Custom - You can split the order by custom amount.


Check: the check will be printed out.
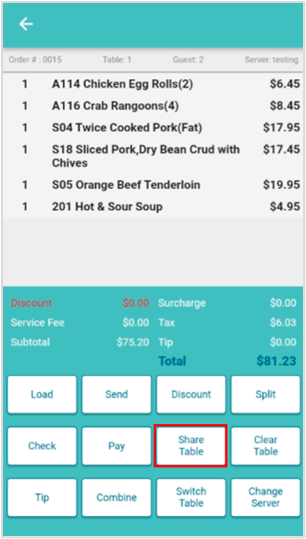
Share Table: When there are more than 1 party seating at the same table, the Share Table feature allows the staff to add another order on the table.
- When adding a new order to the table, it’s also required to enter the number of guests first before the server can start taking the order.
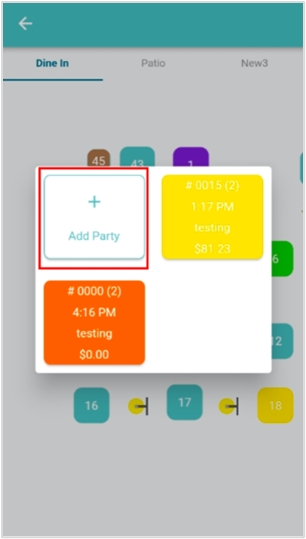
- When there are more than 1 order on the same table, tapping the table will show a list of orders first with the order detailed information including the order number, party size, etc. Tap an order to see the order preview and edit or pay for the order. Tap the “+ Add Party” button to add another order to the table.
- When reopening a dine-in order, the order will be added to the original table as well. If there is an order already on the table, the table will be shared.
Clear Table: you can clear tables if the orders are paid. If one or more orders did not pay on the table that you want to clear, the table will not be clear and the screen will go back to the table screen.
Tip: you can add tips by percentages or dollar amounts.
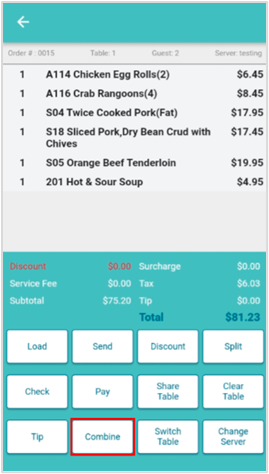
Combine: combining orders can be used when there are multiple customers taking multiple orders on different tables. Then, when they decide to pay for the meal together, the server can combine those orders.
- Tap “Combine” to start combining the selected order with other orders. After tapping the button, a list of open dine-in orders will show up for selection.
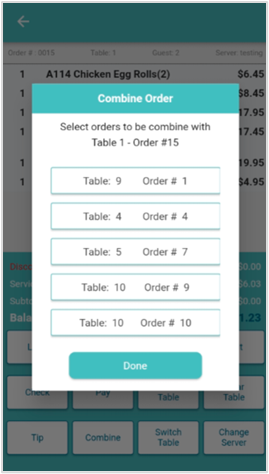
- On the Combine Order modal window, you can see all the orders with the Table number and Order number. Tap to select an order. You can select multiple orders to combine with the current order. Once confirmed, tap the “Done” button below.
- Tapping any one of the tables will show the combined order with the same order information. Paying for the order will close the order on all the tables.

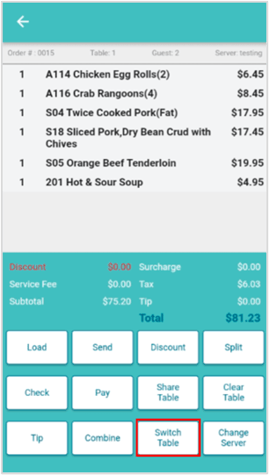
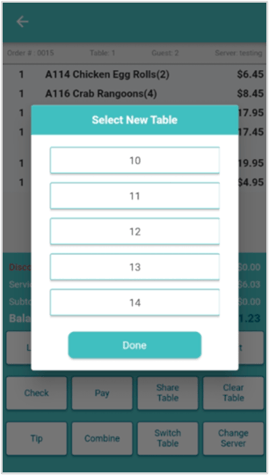
Switch Table: When a group of customers is not satisfied with their table or has more guests to join them when the table is not big enough, they might ask to switch to another table.
- The server can switch the table of an order by tapping the “Switch Table” button on.
- After tapping the button, it will show a list of tables to select from. After selecting a table, the order will be moved to that table. If there is already an order on that table, the table will become a shared table.

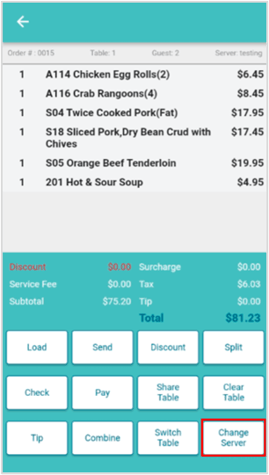
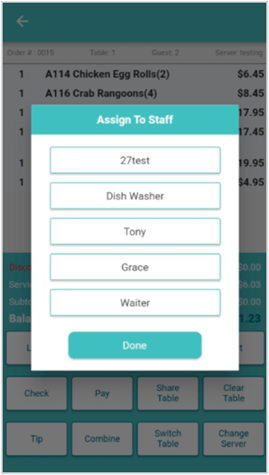
Change Server: you can change server if you want.
- You can change the server of an order by tapping the “Switch Server” button.
- After tapping the button, it will show a list of servers to select from. After selecting a server, the server name will be changed on the order detail.

Check out our video guide on setting your ABCPOS Handheld POS Order Functions