This guide provides an overview of the basic features of the handheld POS device to help you get started.
Table Management
Table Status
-
Seated (Yellow): Table is occupied and order has not been sent to kitchen
-
Sent (Orange): Order has been sent to the kitchen
-
Check (Blue): Check has been printed out
- Available (Teal): Default table setting. Table is available
-
Paid (Green): Order has been paid. Table is not clear yet
- Shared (Purple): Table is shared and there are multiple orders in progress

Table Features

- Load: Edit current order
- Send: Send current order to the kitchen
- Discount: Reduce the price of the overall check or specific item by a percentage (%) or amount ($)
- You can only discount the whole order after it is sent to the kitchen from this screen
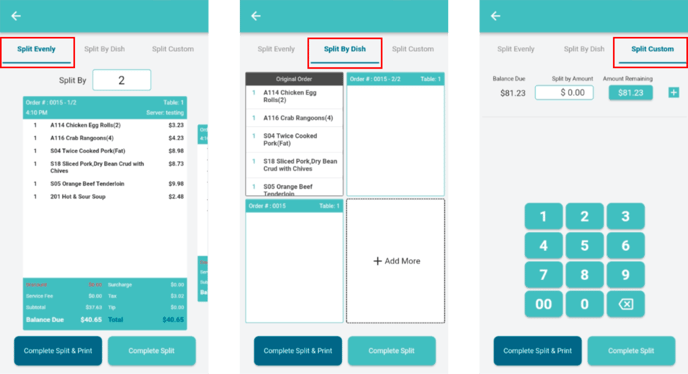
- Split: Allows you to split the bill evenly, by dish or, custom split
- Split Evenly: The default is splitting by the # of guests
- Split by Dish: The default is splitting by 2
- Custom Split: Enter in a custom amount

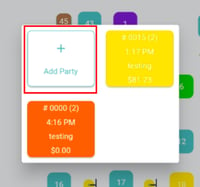
- Share Table: Enables you to take and manage separate orders for different parties sharing the same table.Tapping the shared table will show the current orders in progress. Tap the “+ Add Party” button to add another party.

- Clear Table: Once all orders are paid, the table can be cleared and will automatically be marked as available.
- If one or more orders did not complete payment, you will not be able to clear the table. Cleared tables will automatically be labeled as available.
- Combine: Allows you to combine orders from different tables into a single bill for payment.
- Select order and press "Combine". Select additional orders and press done to merge orders into one bill.
- Switch Table: Allows you to switch a customer's table after placing an order
- Press "Switch Table". Select your desired table from the list of a list of available tables
- If there is already an order on the selected table, the table will automatically become a shared table
- Change Server
- Tap "Change Server". Select your desired server from the list of available servers
Payment
Overview of payment screen features including how to apply discounts, surcharges, tax exemptions, and promo codes.
- Print: Order check will print out
- Discount: Reduce the price of the overall check by a percentage (%) or amount ($)
- Surcharge: Additional fees on the overall check by a percentage (%) or amount ($)
- Tax Exempt: Write a note to indicate if the particular check is exempt from taxation
Order Management
Here we will briefly go over how to manage all orders from:
- Dine In Orders: Overview of Dine In Orders ONLY

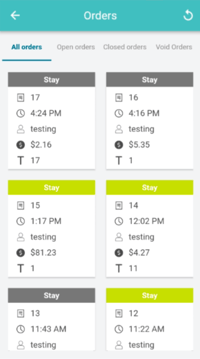
- Summary: Overview of To Go Orders AND Dine In Orders

Order Screen Features
Top Bar Order Functions

- Hold: This feature can be used if you want to add items to a check, but do not want to send it to the kitchen yet
- Pay: Access payment page which includes print receipt, discount entire order, surcharge, taxes, promo code, and payment options
- Multi-Select Items: Select multiple items from your current order
- Tap Multi-Select at the top bar. Once the button switches to Single Select, select your desired items
- Send Options: Send the entire order (Send All) or specific items (Send Select) to the kitchen for preparation.
- Send All: Finalize customer order and press Send. The table will appear orange on the overall table screen
- Send Select: Select items using Multi-Select and press Send. Sent items will be highlighted
Scrolling Horizontal Bar:

- Special Request: Add special instructions by clicking on custom buttons to make modifications (Ex. Add Meat, Less Ice, No Sauce, On the Side, etc)

- Add, Minus, Delete: Select an item and you can add, minus or delete
- Discount: Reduce the price of the overall check or specific item by a percentage (%) or amount ($)
- Whole Order: Select Discount and enter a percentage or amount
- Single Item: Select a single item, select discount, and enter a percentage or amount

- Comp: Selecting this option lets you offer a complimentary or free item(s) to a customer
- NOTE: You can only comp one item at a time.

- Breakline: Use a breakline to separate specific item(s) from the rest of the receipt. Simply select the item and click "Breakline" to add a line below it
- (For example, if a customer is dining in but wants a particular item to be "To Go," you can use a breakline to distinguish that item on the receipt)
- Note: Provide a short typed note for a specific item
- Price Override: Allows an authorized person to change the automated price of a product or service, in order to apply a discount
- NOTE: You can only comp one item at a time

