
A customer-facing display(Second display) is a great way for new products or promotion marketing when your customers walk in.
Make sure you have the Customer Facing Display(Second Display) connected to the POS.
Need a Customer Facing Display? Contact your sales representative or call: 718-321-3888
Step 1. Find POS Settings
- After logging into your dashboard, Go to POS Settings.
- Choose the Branch you want to make changes to.

Step 2. Find Customer Facing Display Setting Under POS Display Settings Tab
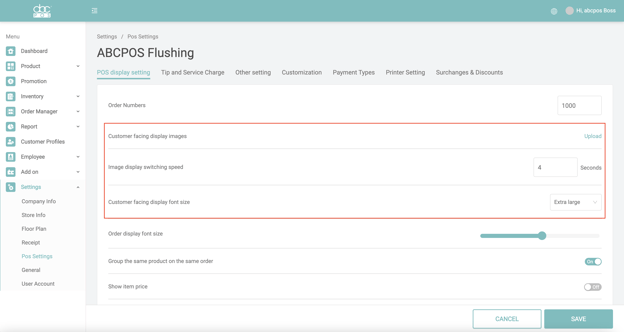
- Click the POS Display Setting tab to see the Customer Facing Display Settings of the selected branch.
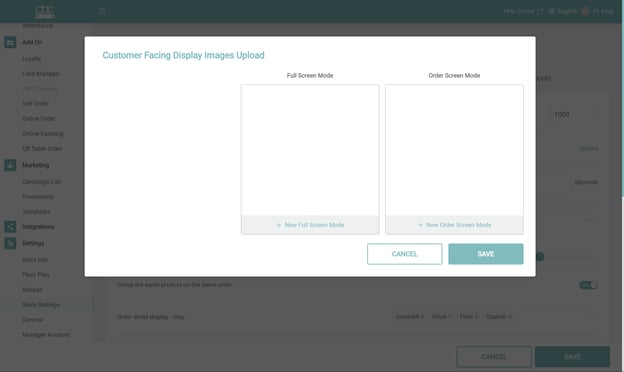
- Click Upload and you will see a popup screen for managing your images.
- Image display switching speed: It controls how long an image will stay on the screen when rotating
- Customer facing display font size: Used to adjust the text size on the customer-facing display.
Step 3. Manage the images: Adding, Activating, Deleting images
Adding an image
- Click “+” button
- Select and upload the image form your device.
- Click “Save” and leave the popup screen
Activating/ Deactivating
- Activating - check the checkbox, and your image will be able to display on the Customer Facing display screen.
- Deactivating - uncheck the checkbox, and your image will not be displayed nor be deleted.
- Click “Save” and leave the pop-up screen

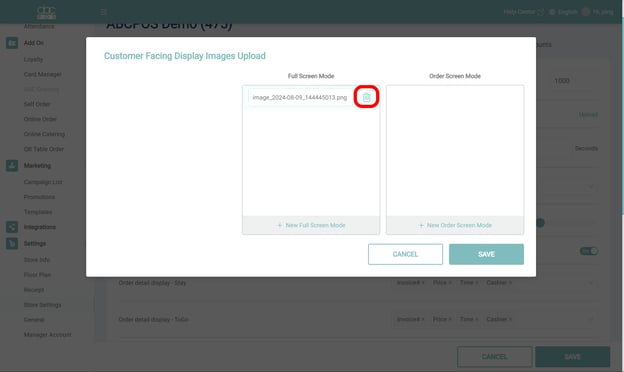
Deleting an image
- Mouse hover on the image name that you want to delete
- Find the “X” button
- Click the “X” button and the image will be deleted.
- Click “Save” and leave the pop-up screen
Step 4. Save the changes and restart the POS
Click “SAVE” and restart the POS software, your images will be updated.
