
Back Office Settings
1. Activation
For new clients who don’t have the Loyalty feature activated, you will see the activation
screen when accessing the Add-on > Loyalty feature.
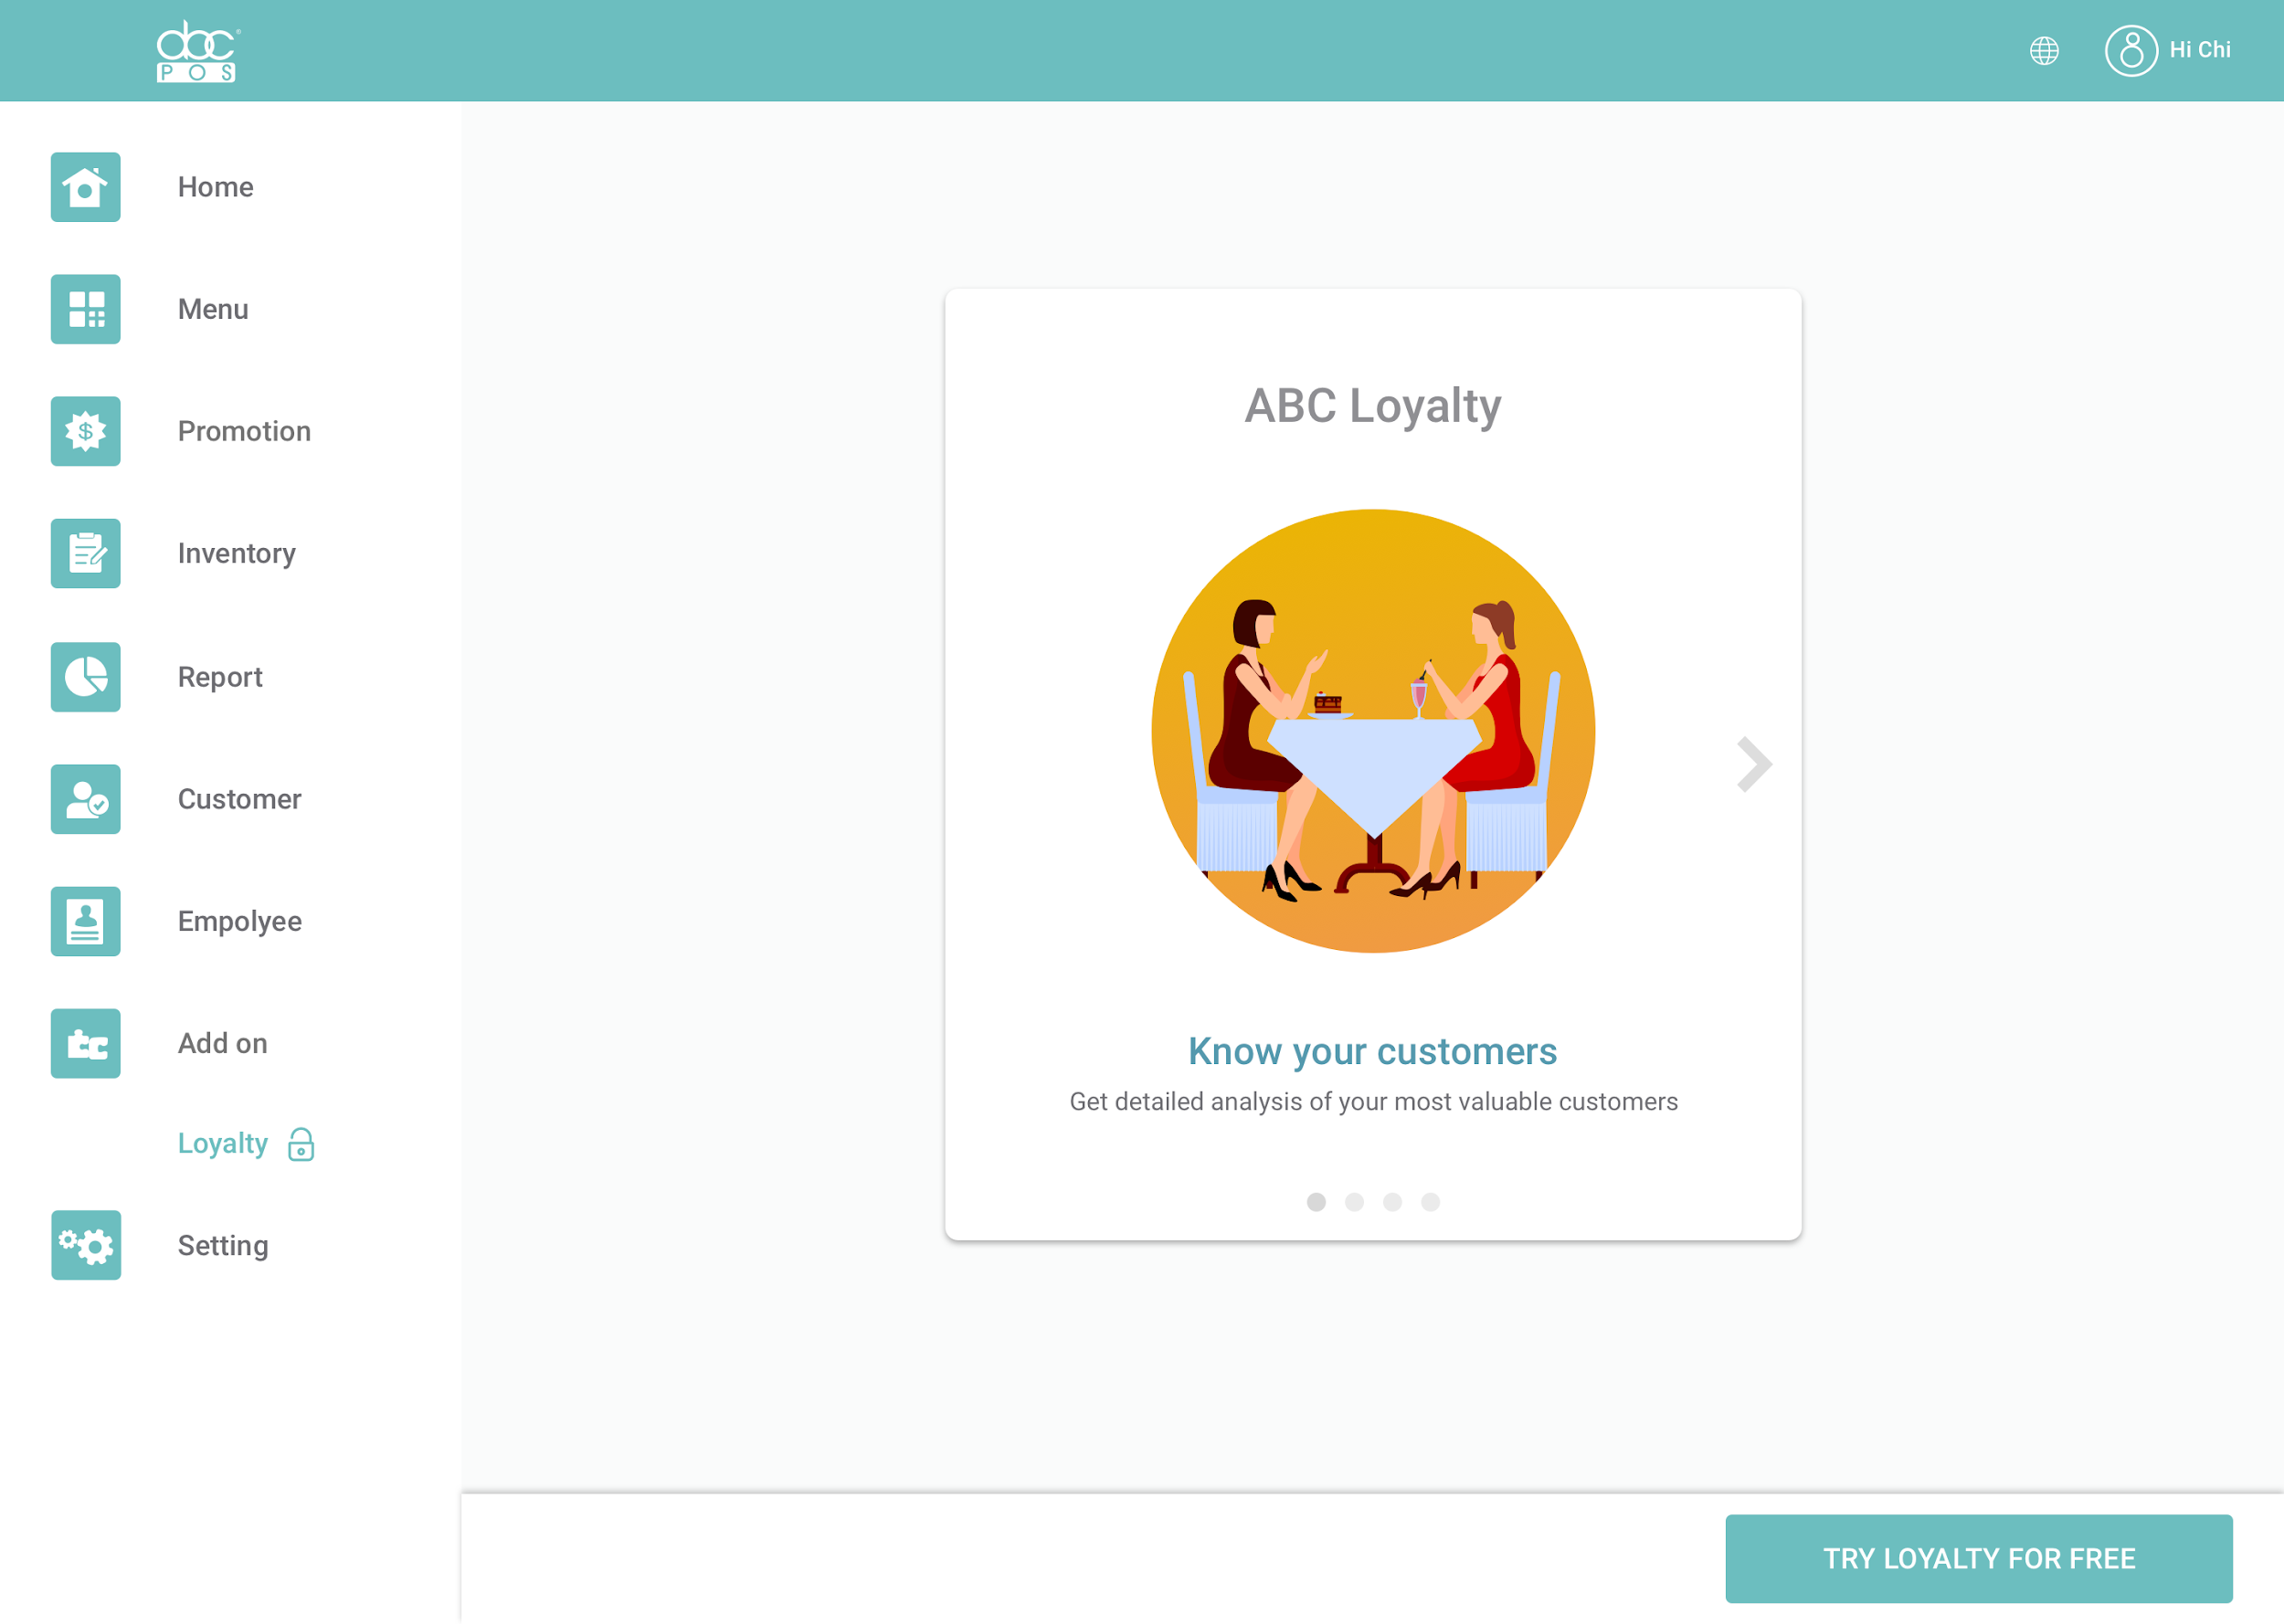
Click the “Try Loyalty for free” button to activate Loyalty for your company. Once
activated, you’ll be able to use basic loyalty features. To upgrade to Loyalty Premium Plan,
please contact us to help you upgrade: (718) 321-3888
2. Reward Point Rules
Earning Points Setup
The reward point rule is a great way for merchants to encourage customer loyalty and increase sales. It provides customers with an incentive to visit the shop frequently and make purchases both online and offline, while also rewarding them for their loyalty. There are three ways that merchants can set up in the back office to allow the customer to earn points. These reward point rules incentivize customers to visit the shop regularly, make larger purchases, and use the merchant's loyalty app.
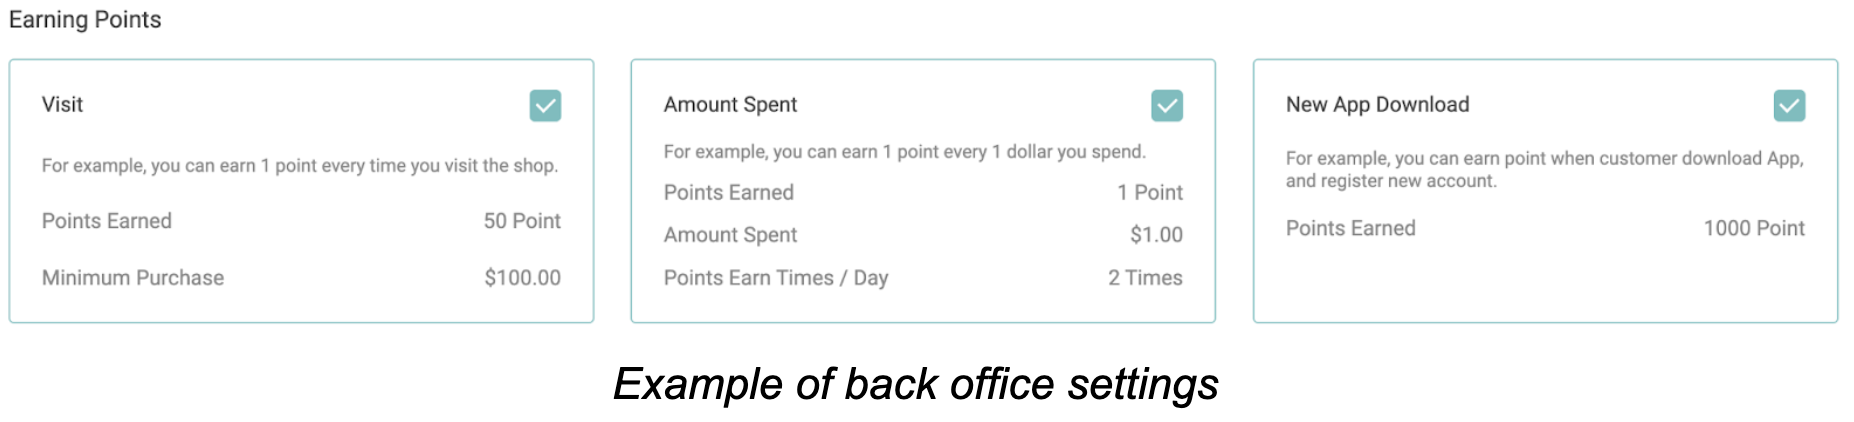
- Visit
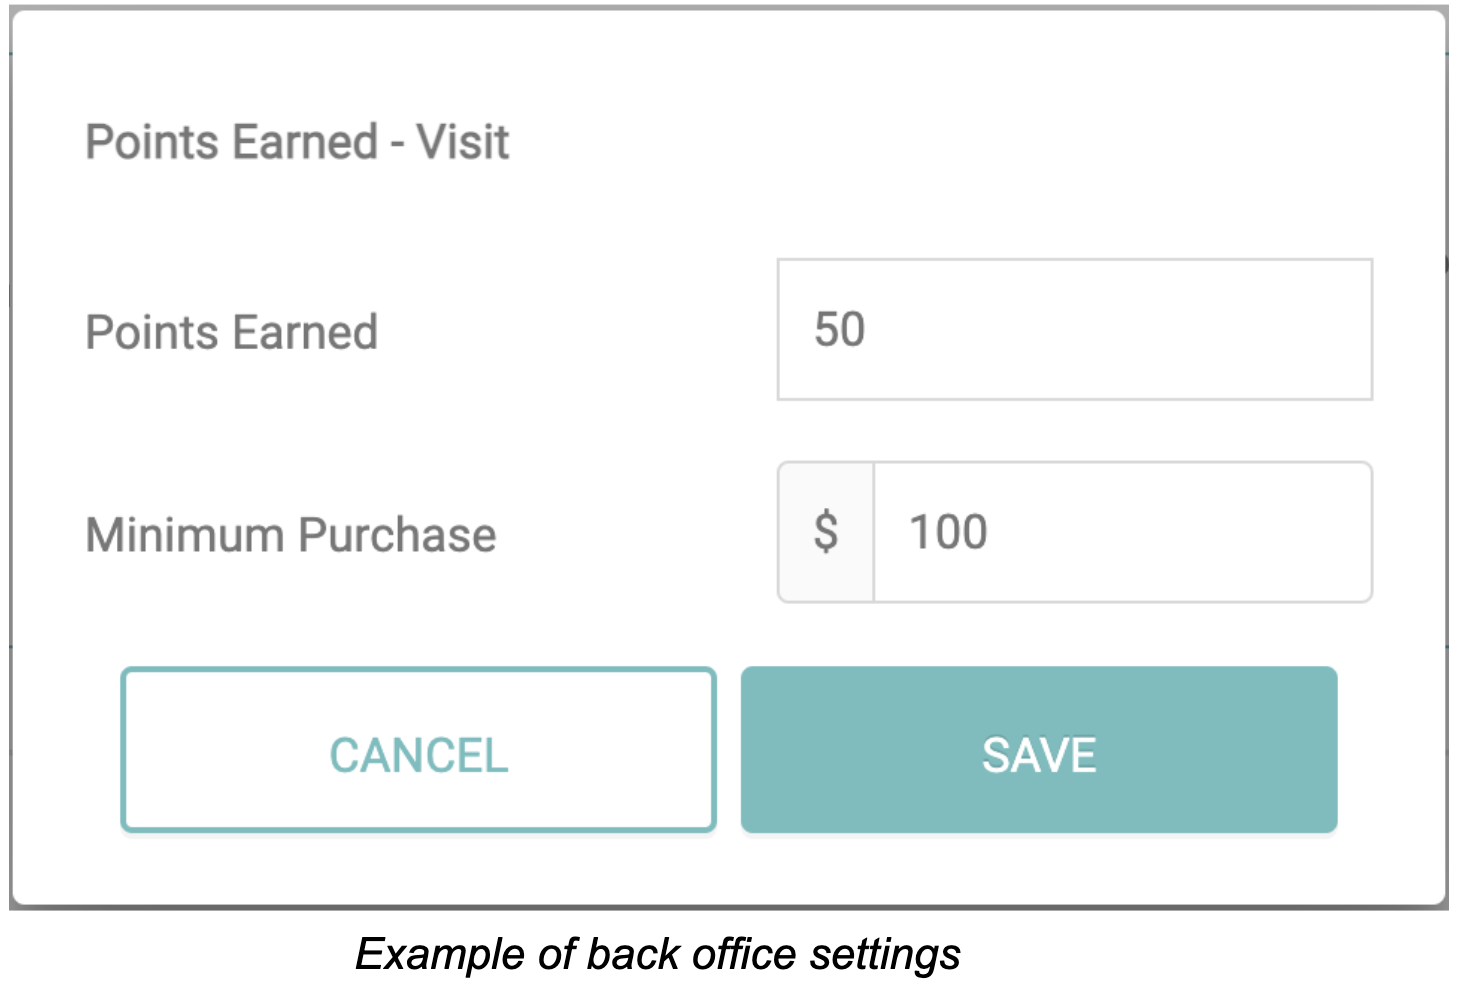
One of the reward point rules set up in the merchant's back office is to earn a certain amount of points every time a customer visits the shop and makes a minimum purchase. For example, the merchant can set up the rule so that customers earn 50 points for a minimum of 100 dollars spent. Here's how the rule works:
How are customers earning points?
To earn reward points, the customer must have the merchant's loyalty app installed on their smartphone. When the customer walks into the shop and makes a minimum purchase, the shop staff can scan the QR code from the customer's loyalty app to gather points for the customer. The number of points earned for each visit is predetermined and set up in the back office.
This reward point rule encourages customers to visit the shop regularly and make purchases, while also providing them with a tangible reward for their loyalty.
这种奖励积分规则鼓励顾客经常到店购物,同时为他们的忠诚提供了实际的回报。
- Amount Spent
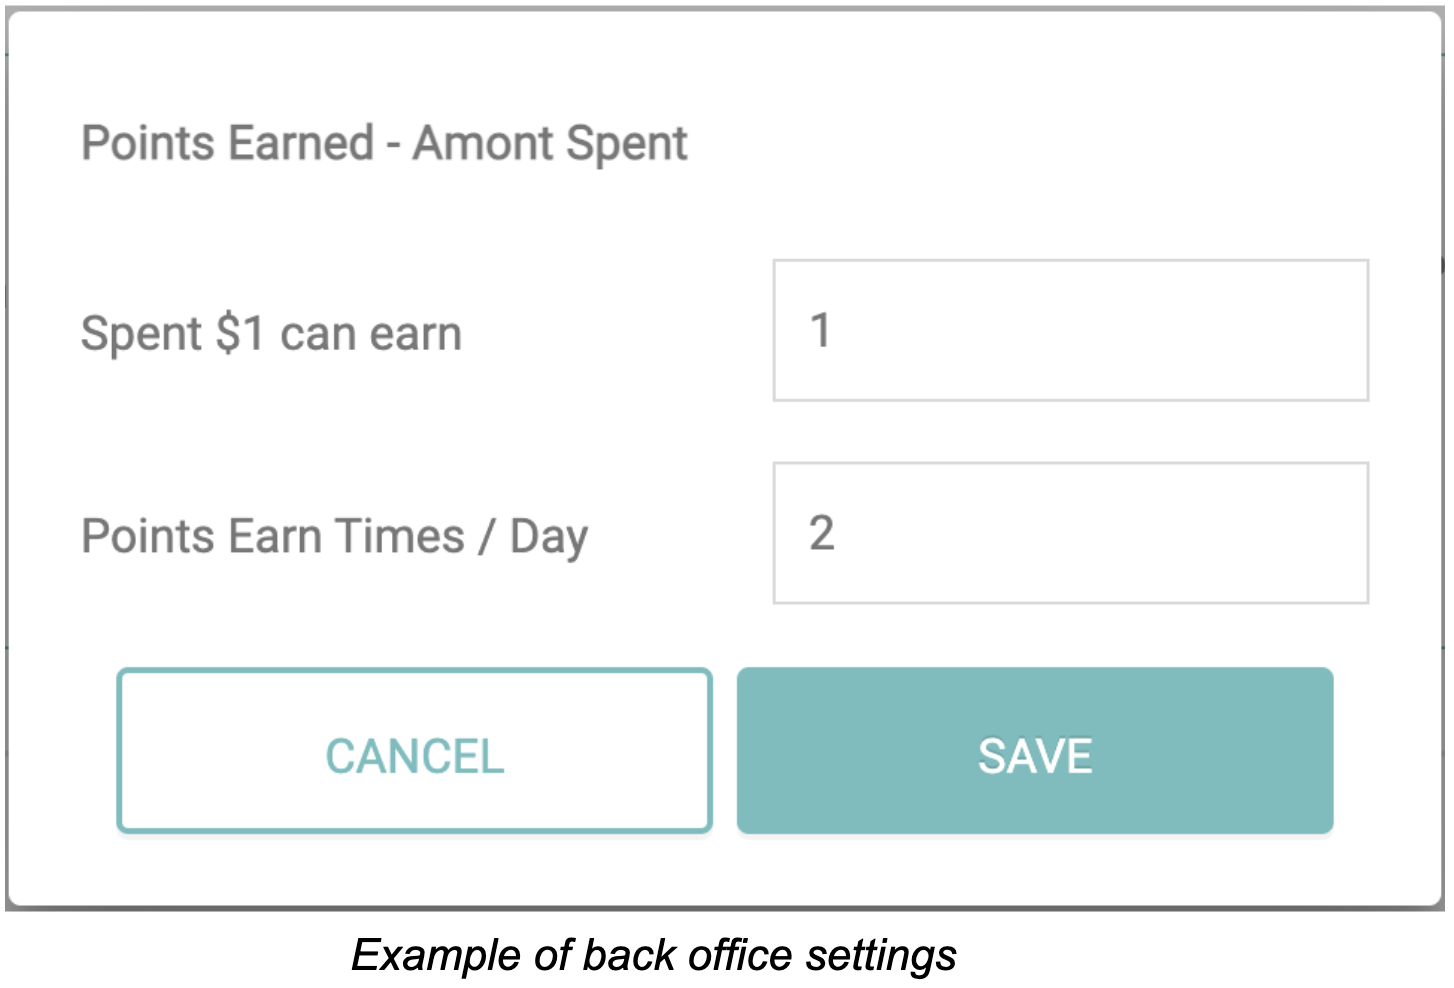
The second reward point rule set up in the merchant's back office is to earn a certain amount of points for every dollar spent. For example, the merchant can set up the rule so that customers earn one point for every dollar spent, or they can set up the rule so that customers earn 0.5 points for every dollar spent. The merchant can also set a maximum number of times per day that a customer can earn points through this method.
How are customers earning points?
To earn reward points, the customer must have the merchant's loyalty app installed on their smartphone. There are two ways the customers can earn points: 1. When the customer walks into the shop to make a purchase, the shop staff can scan the QR code from the customer's loyalty app to gather points for the customer. 2. The customer can make online purchases from the loyalty app and the points will be earned automatically.
This rule encourages customers to make larger purchases and spend more money at the shop, while also rewarding them for their loyalty.
- New App Download
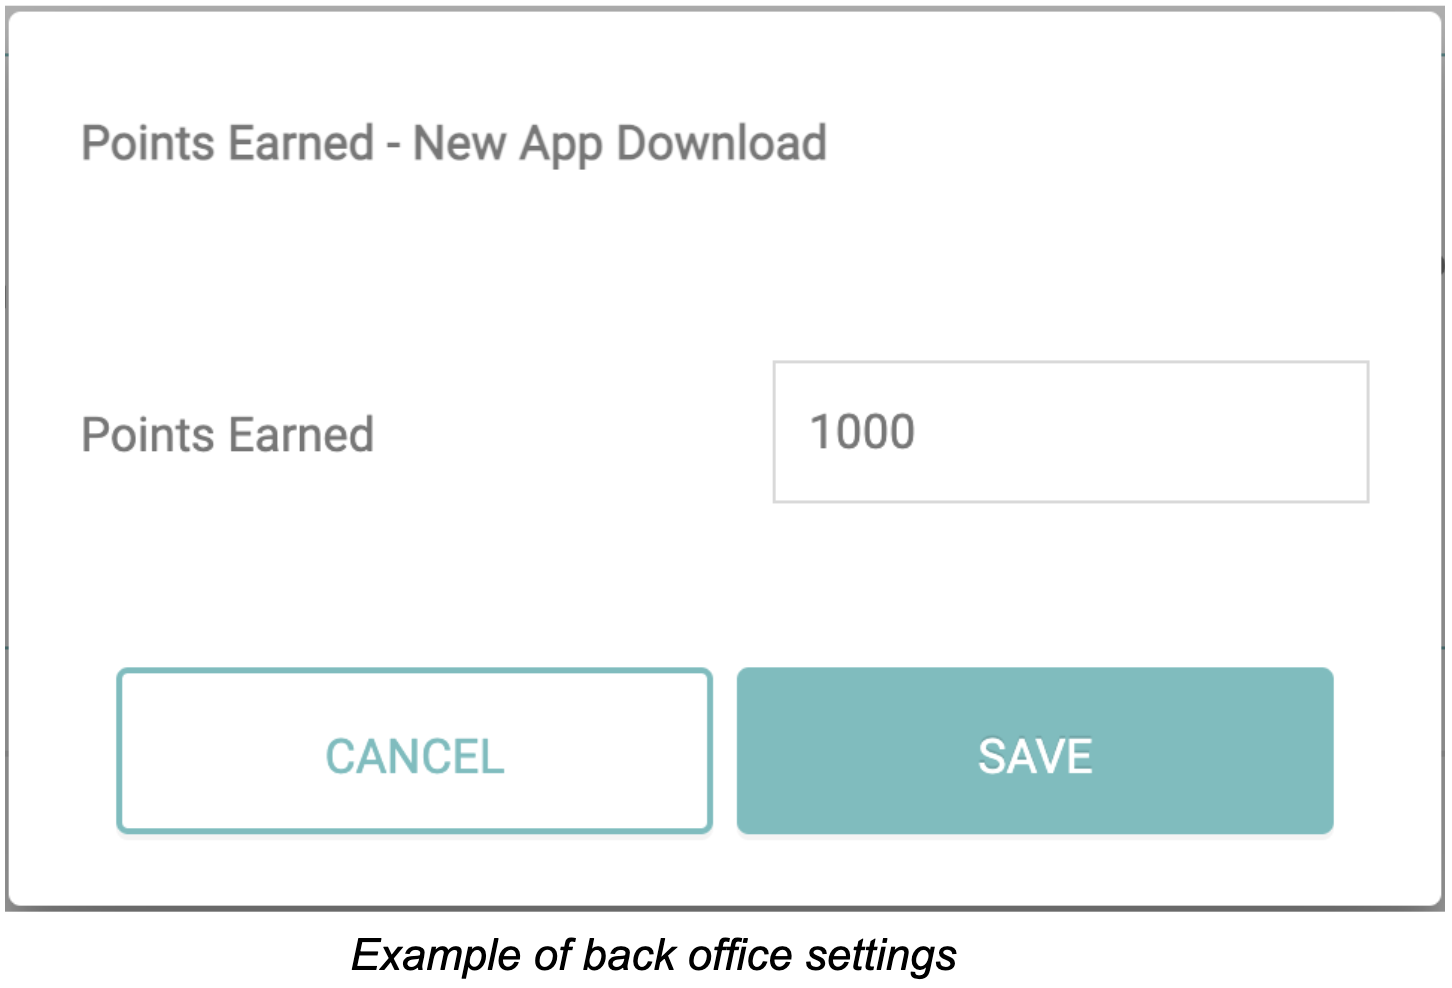
The third reward point rule that can be set up in the merchant's back office is to reward customers for downloading and installing the merchant's loyalty app. For example, the merchant can set up the rule so that customers earn 1000 points for downloading the app and creating an account.
How are customers earning points?
To earn reward points, the customer must have the merchant's loyalty app installed on their smartphone. Once the customer has downloaded the app and created an account, the reward points will be automatically added to their account.
This rule encourages customers to download and use the merchant's loyalty app, which can help them earn more rewards and stay engaged with the merchant's business.
X$
Redeeming Points Setup
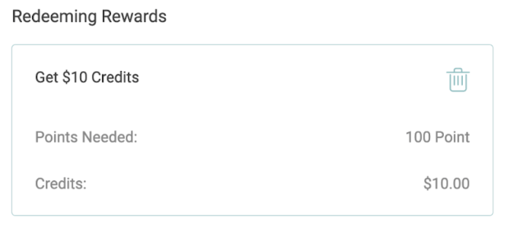
The redeeming reward points rule is a process that allows customers to redeem their earned reward points for credits that can be used toward purchases. The rule is set up by the merchant and includes the following steps:
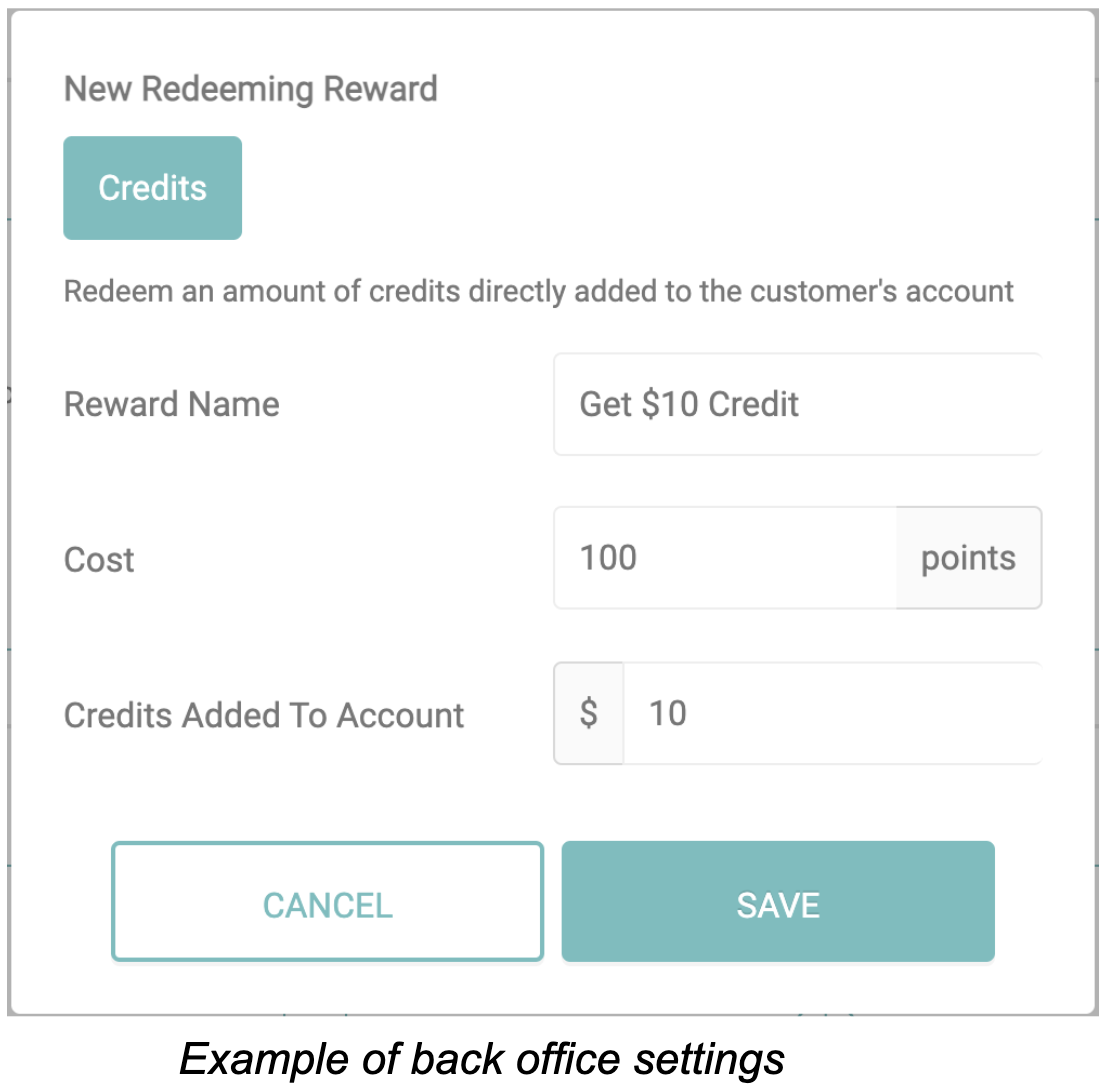
Step 1: Create a reward name: The merchant creates a name for the reward program, which will be displayed to customers.
Step 2: Set up certain points for cost: The merchant sets up the number of reward points that are required to redeem the reward.
Step 3: Set up a specific dollar amount (credits) that can be redeemed for certain points: The merchant sets up the dollar amount (credits) that the customer will receive for the number of redeemed reward points.
How are customers redeeming points?
Once the above steps merchant have been completed and set up in the back office, customers can redeem their reward points for credits. To do so, they need to access the royalty app and follow the following steps:
Step 1: Select the reward they want to redeem: Customers can choose how many reward points they want to redeem.
Step 2: Redeem the points: Once the customer has selected their reward points, they can redeem their reward points for credits.
Step 3: Credits added to the customer's account: The amount of credits that the customer has earned will be directly added to their account, and they can use these credits towards future purchases.
Level Status Setup

Reward point benefit settings offer various benefits to customers who participate in the loyalty program. These benefits can be customized for each level, providing customers with an incentive to earn points and reach higher levels.
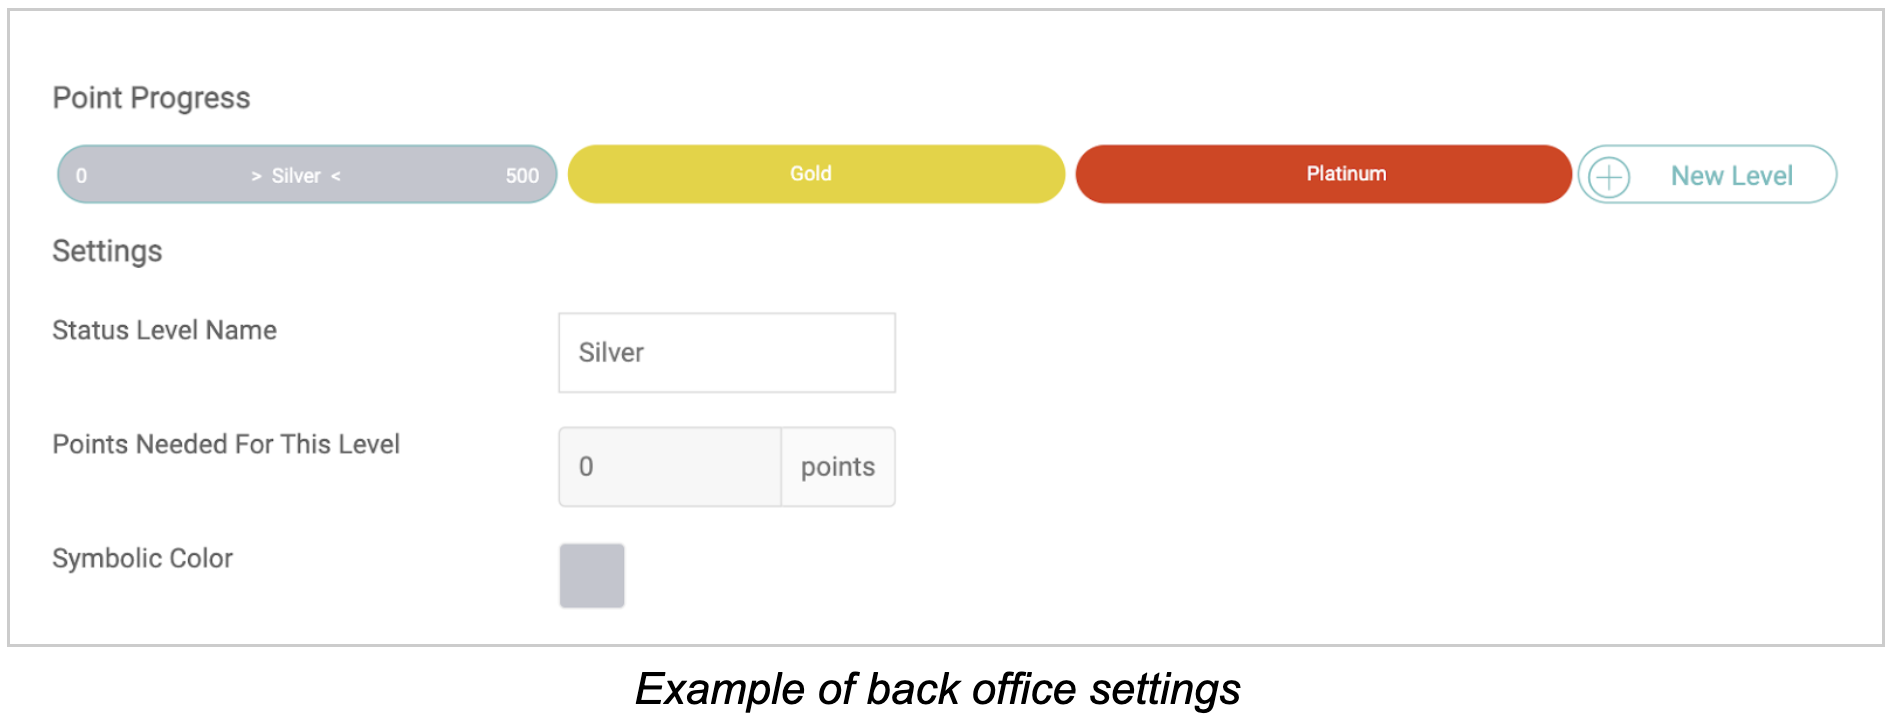
Customers can be categorized into different levels based on the total number of points they have earned. Merchants can set multiple levels with minimum points required for each level. Each level can also have a unique name and symbolic color. Spending points will not affect the total number of points earned by the customer. For example, if a customer has earned a total of 501 points, they will be automatically promoted to the "Gold" level and can enjoy all the benefits that come with that level. Merchants must be cautious when editing the "Points Needed" attribute for each level, as it can impact the levels of existing customers and potentially provide better benefits too easily. Here's the description of each setting:
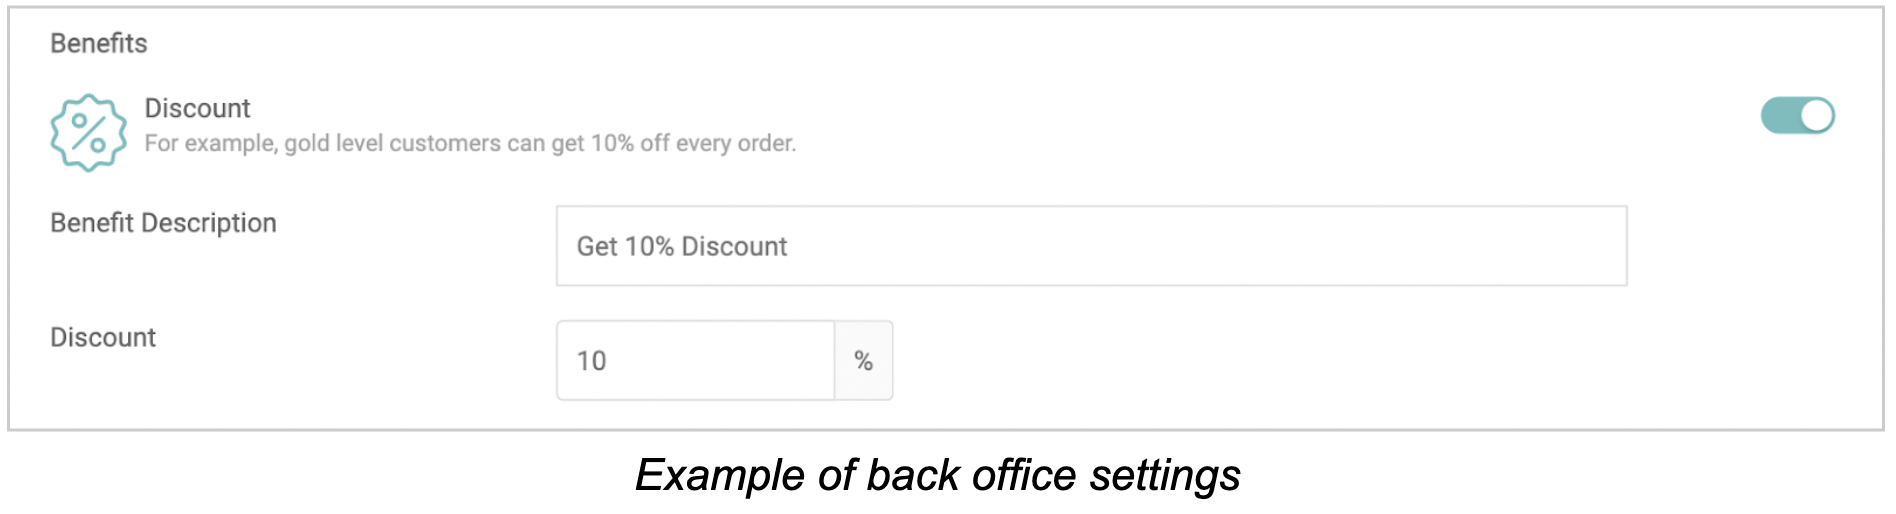
The first benefit is the Discount, which can be customized for each level to provide customers with higher discounts as they earn points and reach higher levels. Disabling the discount benefit for the current level can be done by turning off the switch on the right. The benefit description will be shown on the loyalty app.
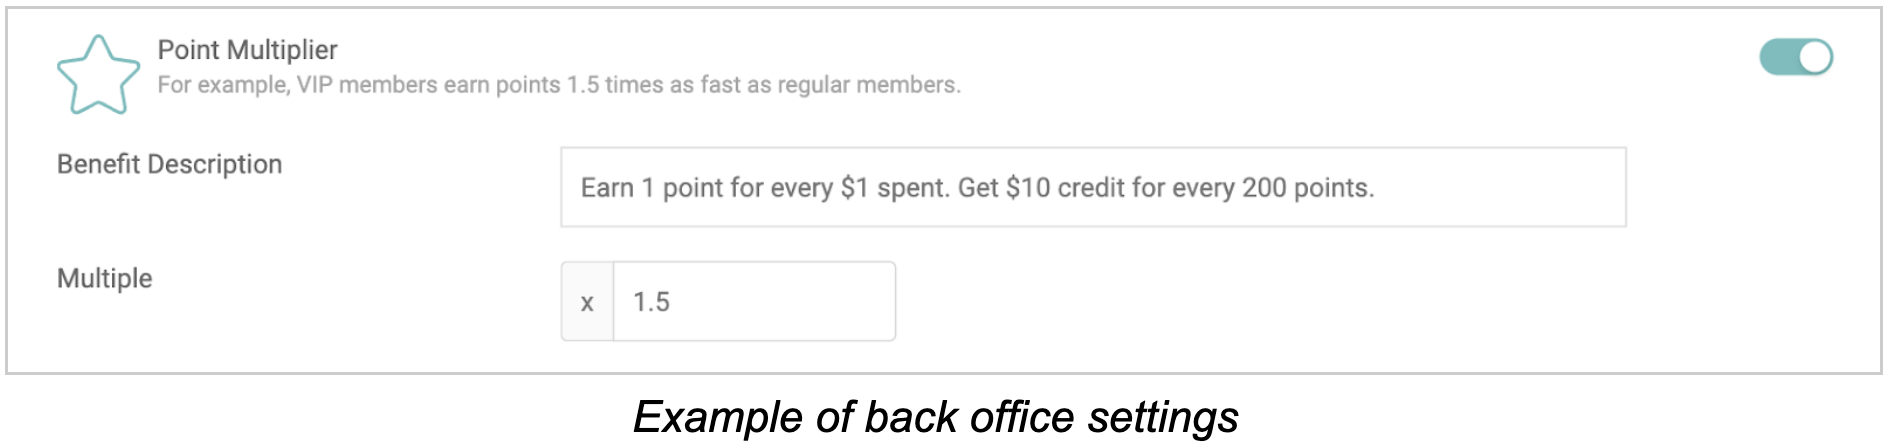
The second benefit is Point Multiplier. Customers at this level can earn loyalty points faster than those at the base level. For example, if a customer earns 4 points for making a purchase under normal rules, they will automatically receive 6 points if they are at this level. To disable the "Point Multiplier" benefit for the current level, simply turn off the switch on the right. The benefit description will be displayed in the loyalty app.

The third benefit is the Birthday Rewards. Customers at this level will receive a reward on their birthday when they place an order at the store. There are two types of birthday rewards that can be stacked. The Birthday Discount only applies to the customer's first order at the store on their birthday, and will not apply to all orders on that day or across all branches. The Point Multiplier is a special multiplier that applies to the customer's points earned on their birthday. For every point earned on their birthday, the customer will receive this multiplier added to their points earned. The Birthday Point Multiplier will override the level point multiplier on the customer's birthday. When a customer signs up for the loyalty app, they can enter their birthday, which cannot be edited to prevent abuse of the birthday rewards system.

The last benefit is the In-store Benefit. Multiple benefits can be set up for each level. To add a new benefit, click the “+ Add an in-store benefit” button. To delete a benefit, click the “Delete” icon on the right of its description. In-store benefits can include faster or higher quantity services. These benefits will be displayed to customers on the loyalty app.
Notification Setup
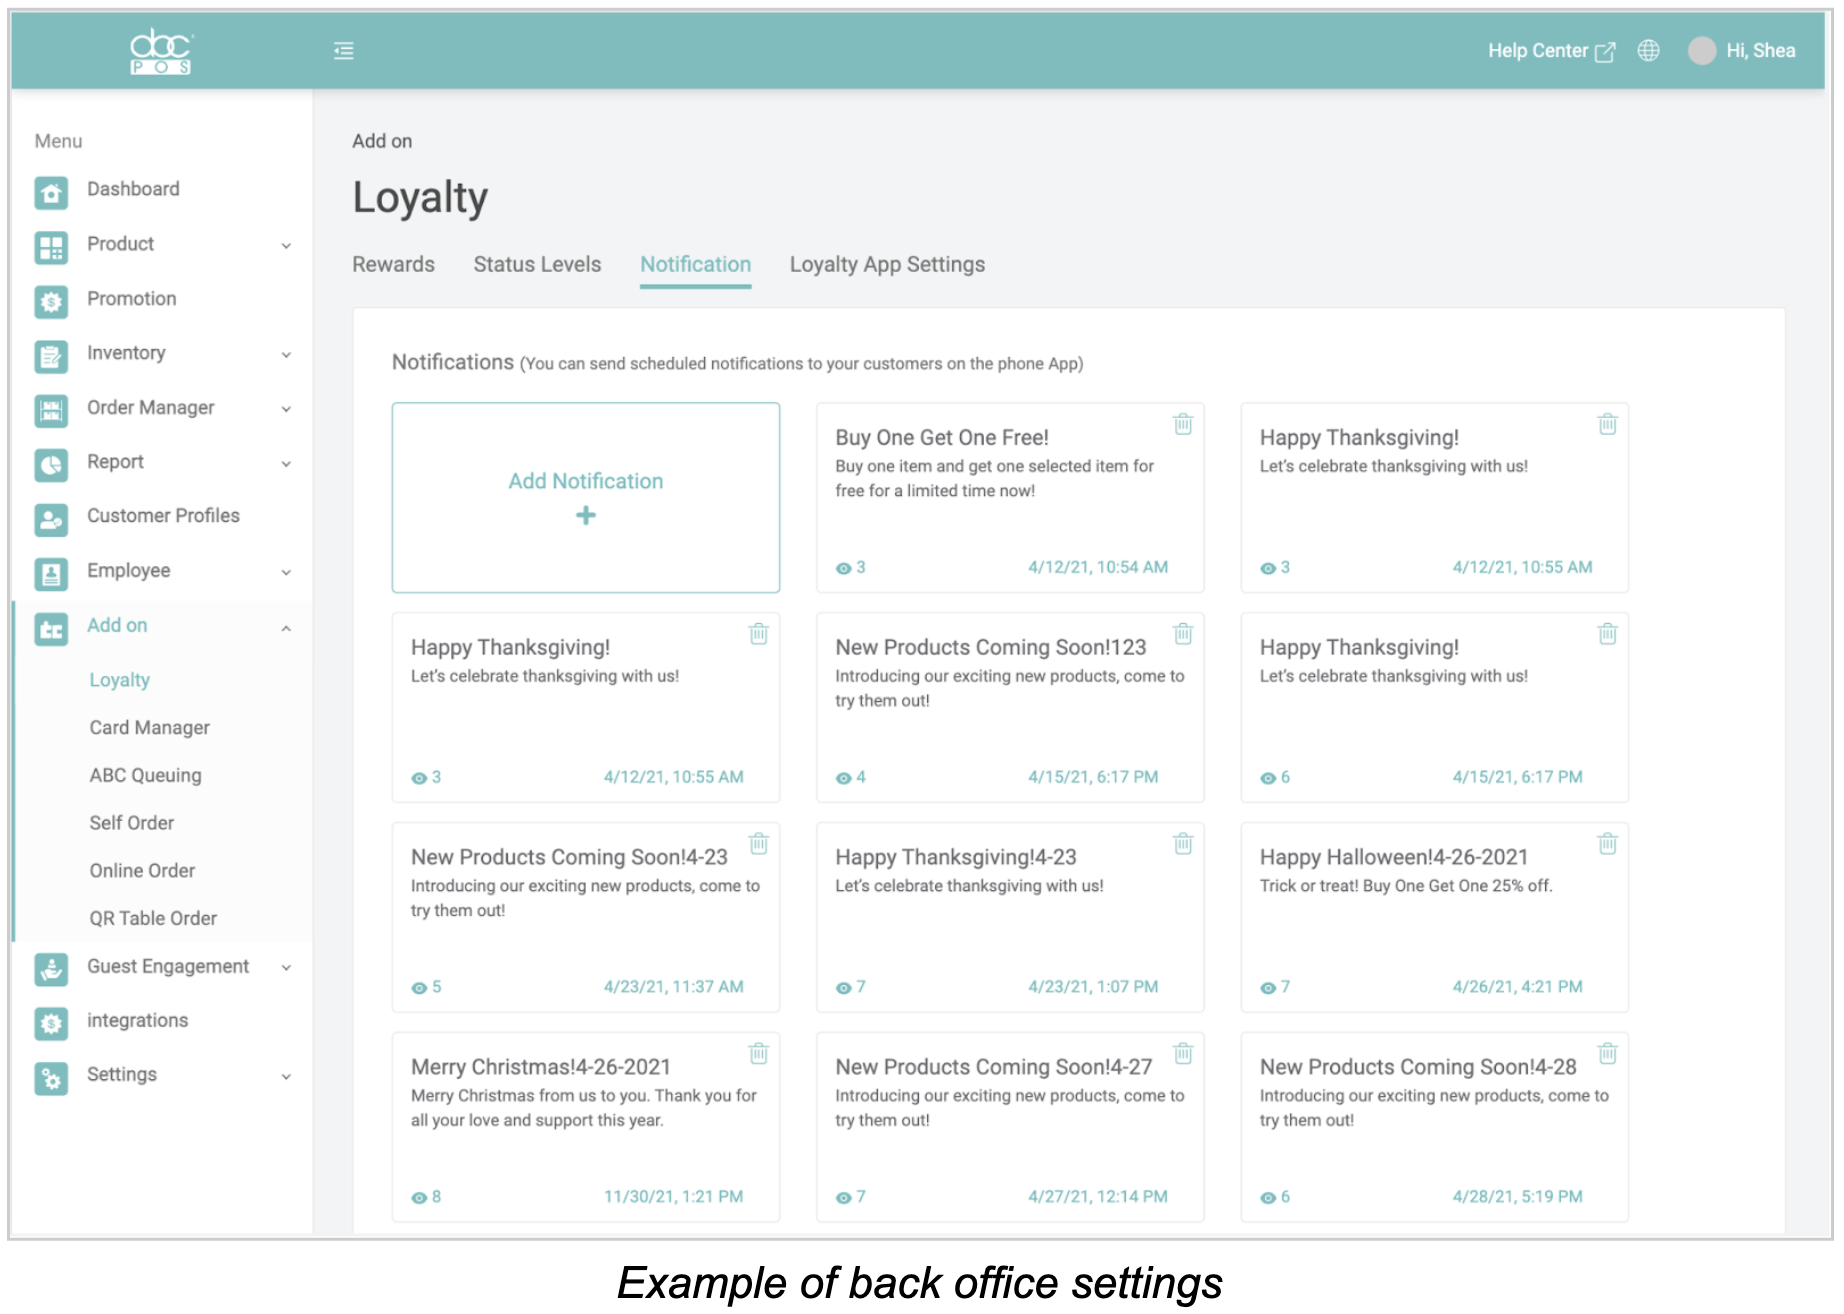
Sending notifications allows the merchant to send out marketing messages or new promotions to customers. The customers will be informed and see the messages on the loyalty app.
The “Notifications” page, shows all the previous messages sent to the customers, together with the view numbers and the message sending time. Click the message to edit and send the message again. Click the “Delete” button to delete that message, and the message will no longer be visible to the customers on the loyalty app.
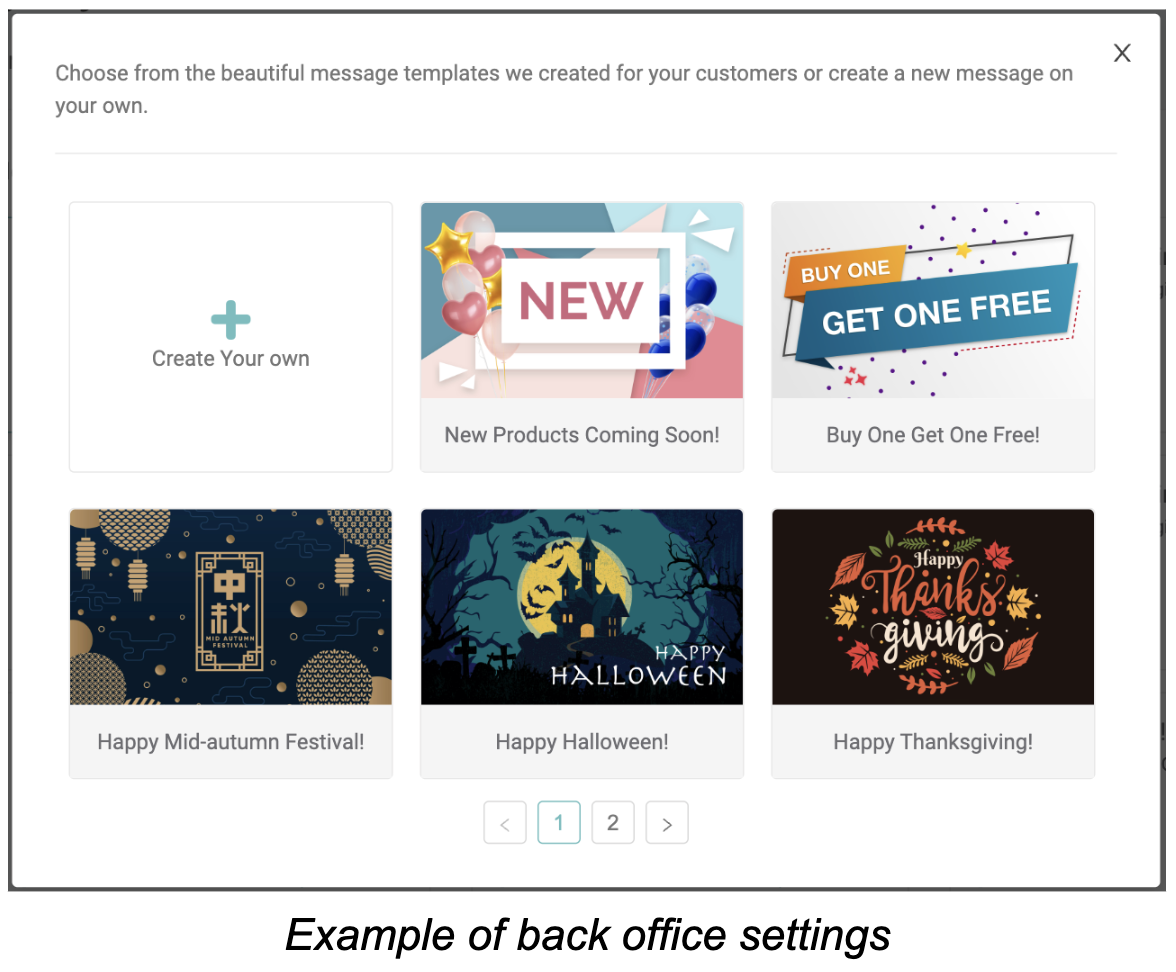
To create a new notification, click the “Add Notification” button. Either select a message
template or create an empty one. Then, you can edit the message details.
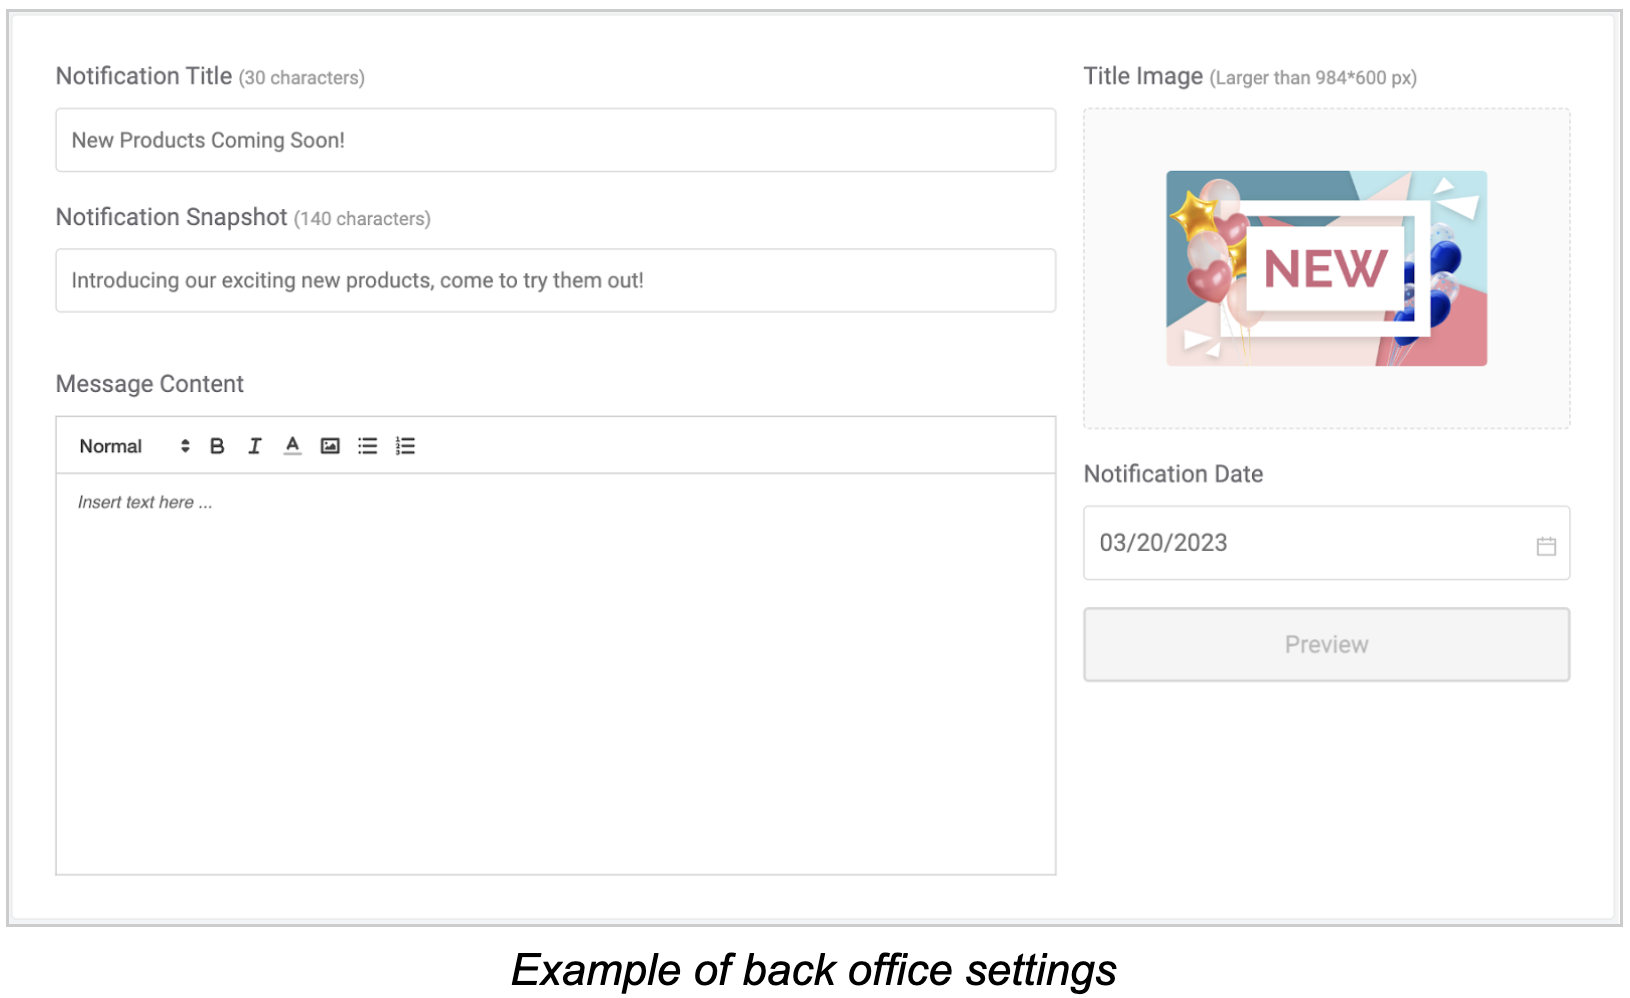
A notification contains 4 parts: Title image, Title, Snapshot, and content. The message title, title image, and snapshot showed on the message preview and the notification the customers get. To view the message details, the customers need to tap the message to view the message content, which is highly customizable. You can insert text and images of different font sizes, colors, and styles into the message content.
Before sending the notification out, you need to select the date and time to send it first. You can also click the “Preview” button to see what it will look like on the loyalty app. Then, click the “Save” button on the bottom right corner to finish and send/schedule the loyalty app notification.
Loyalty App Settings

There is also a setting in the back office that allows customers to provide feedback directly to the business. This feedback can be incredibly valuable in improving the product or service offered. We recommend that the merchant set the email address to receive this feedback to our company email (which is the default) so that we can review and analyze the feedback to make informed decisions about our ABCPOS product improvements.
3. Loyalty reports
While enabling the Loyalty feature, you can check the loyalty reports to track the
performance and your customers status. Go to Reports > Loyalty to view the loyalty reports.
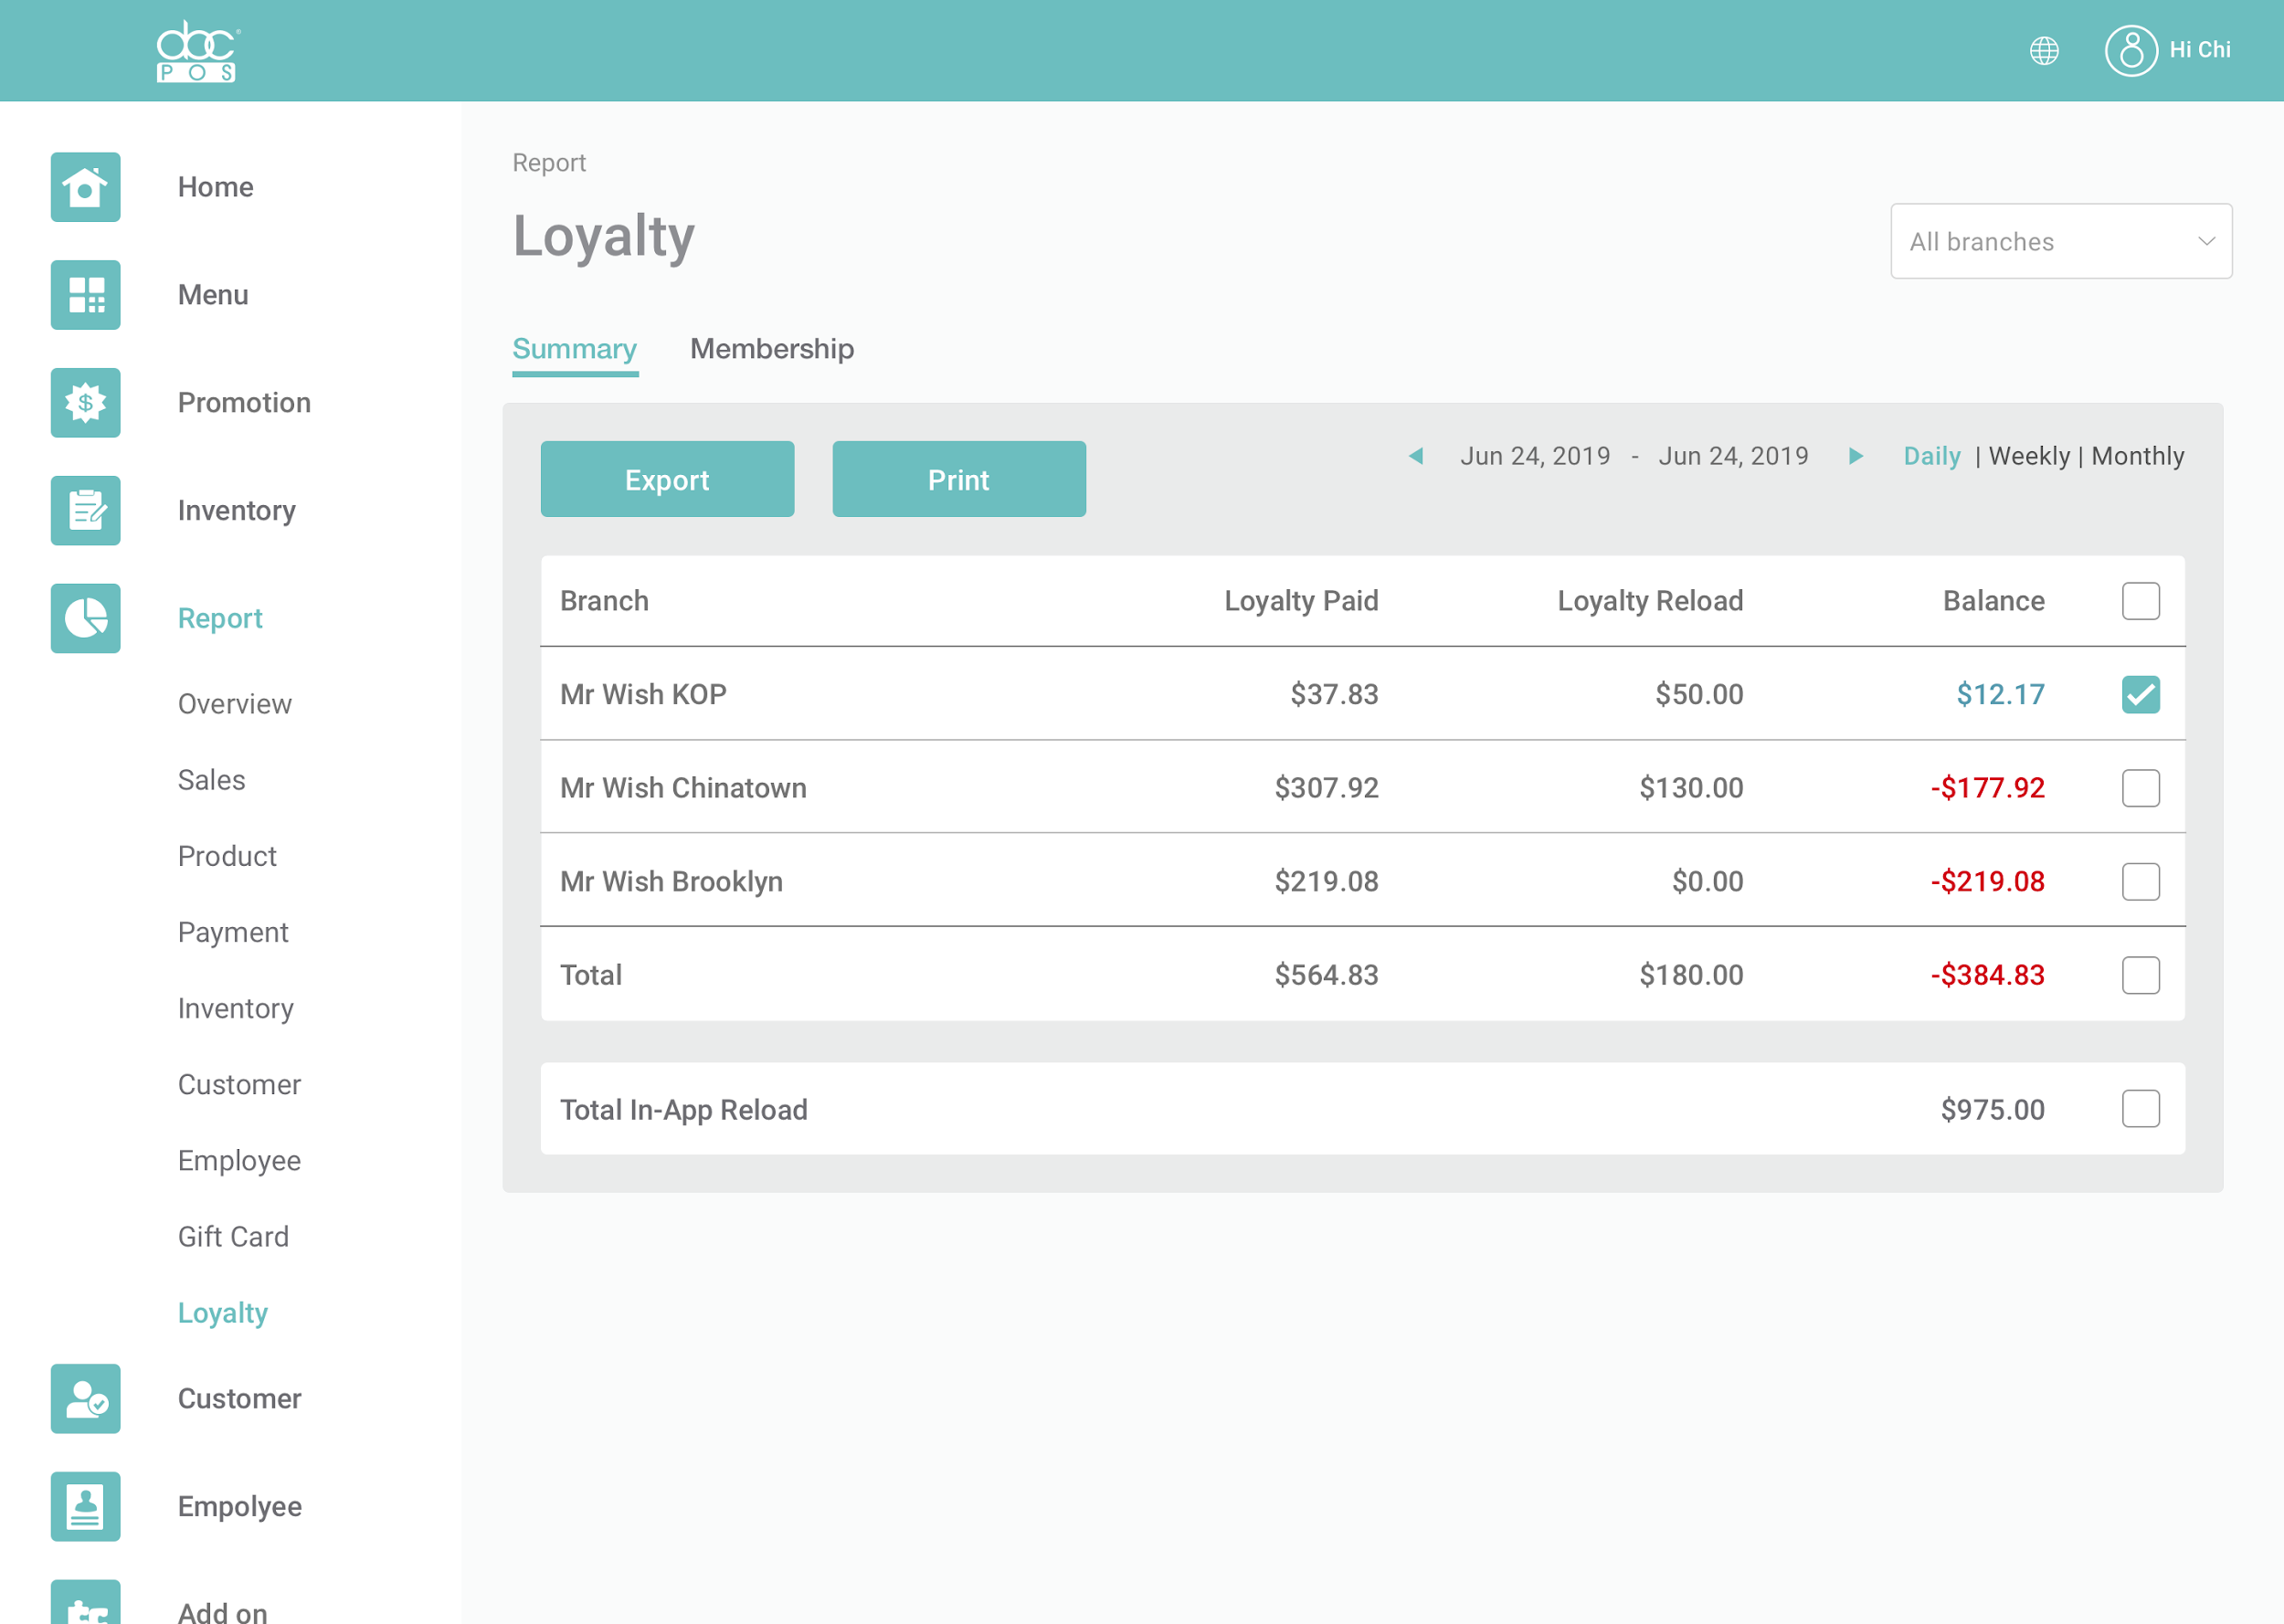
The first report - Loyalty Summary Report is mainly used for the restaurants to track the
money flow between the company and each branch. Because we allow the customers to
reload and spend their account credit balance at multiple branches, it can happen that a
branch gets more or less cash/credit card payments than the value of items sold. So, the
company can track how much each branch earns or loses with loyalty in this report and
balance it out internally.
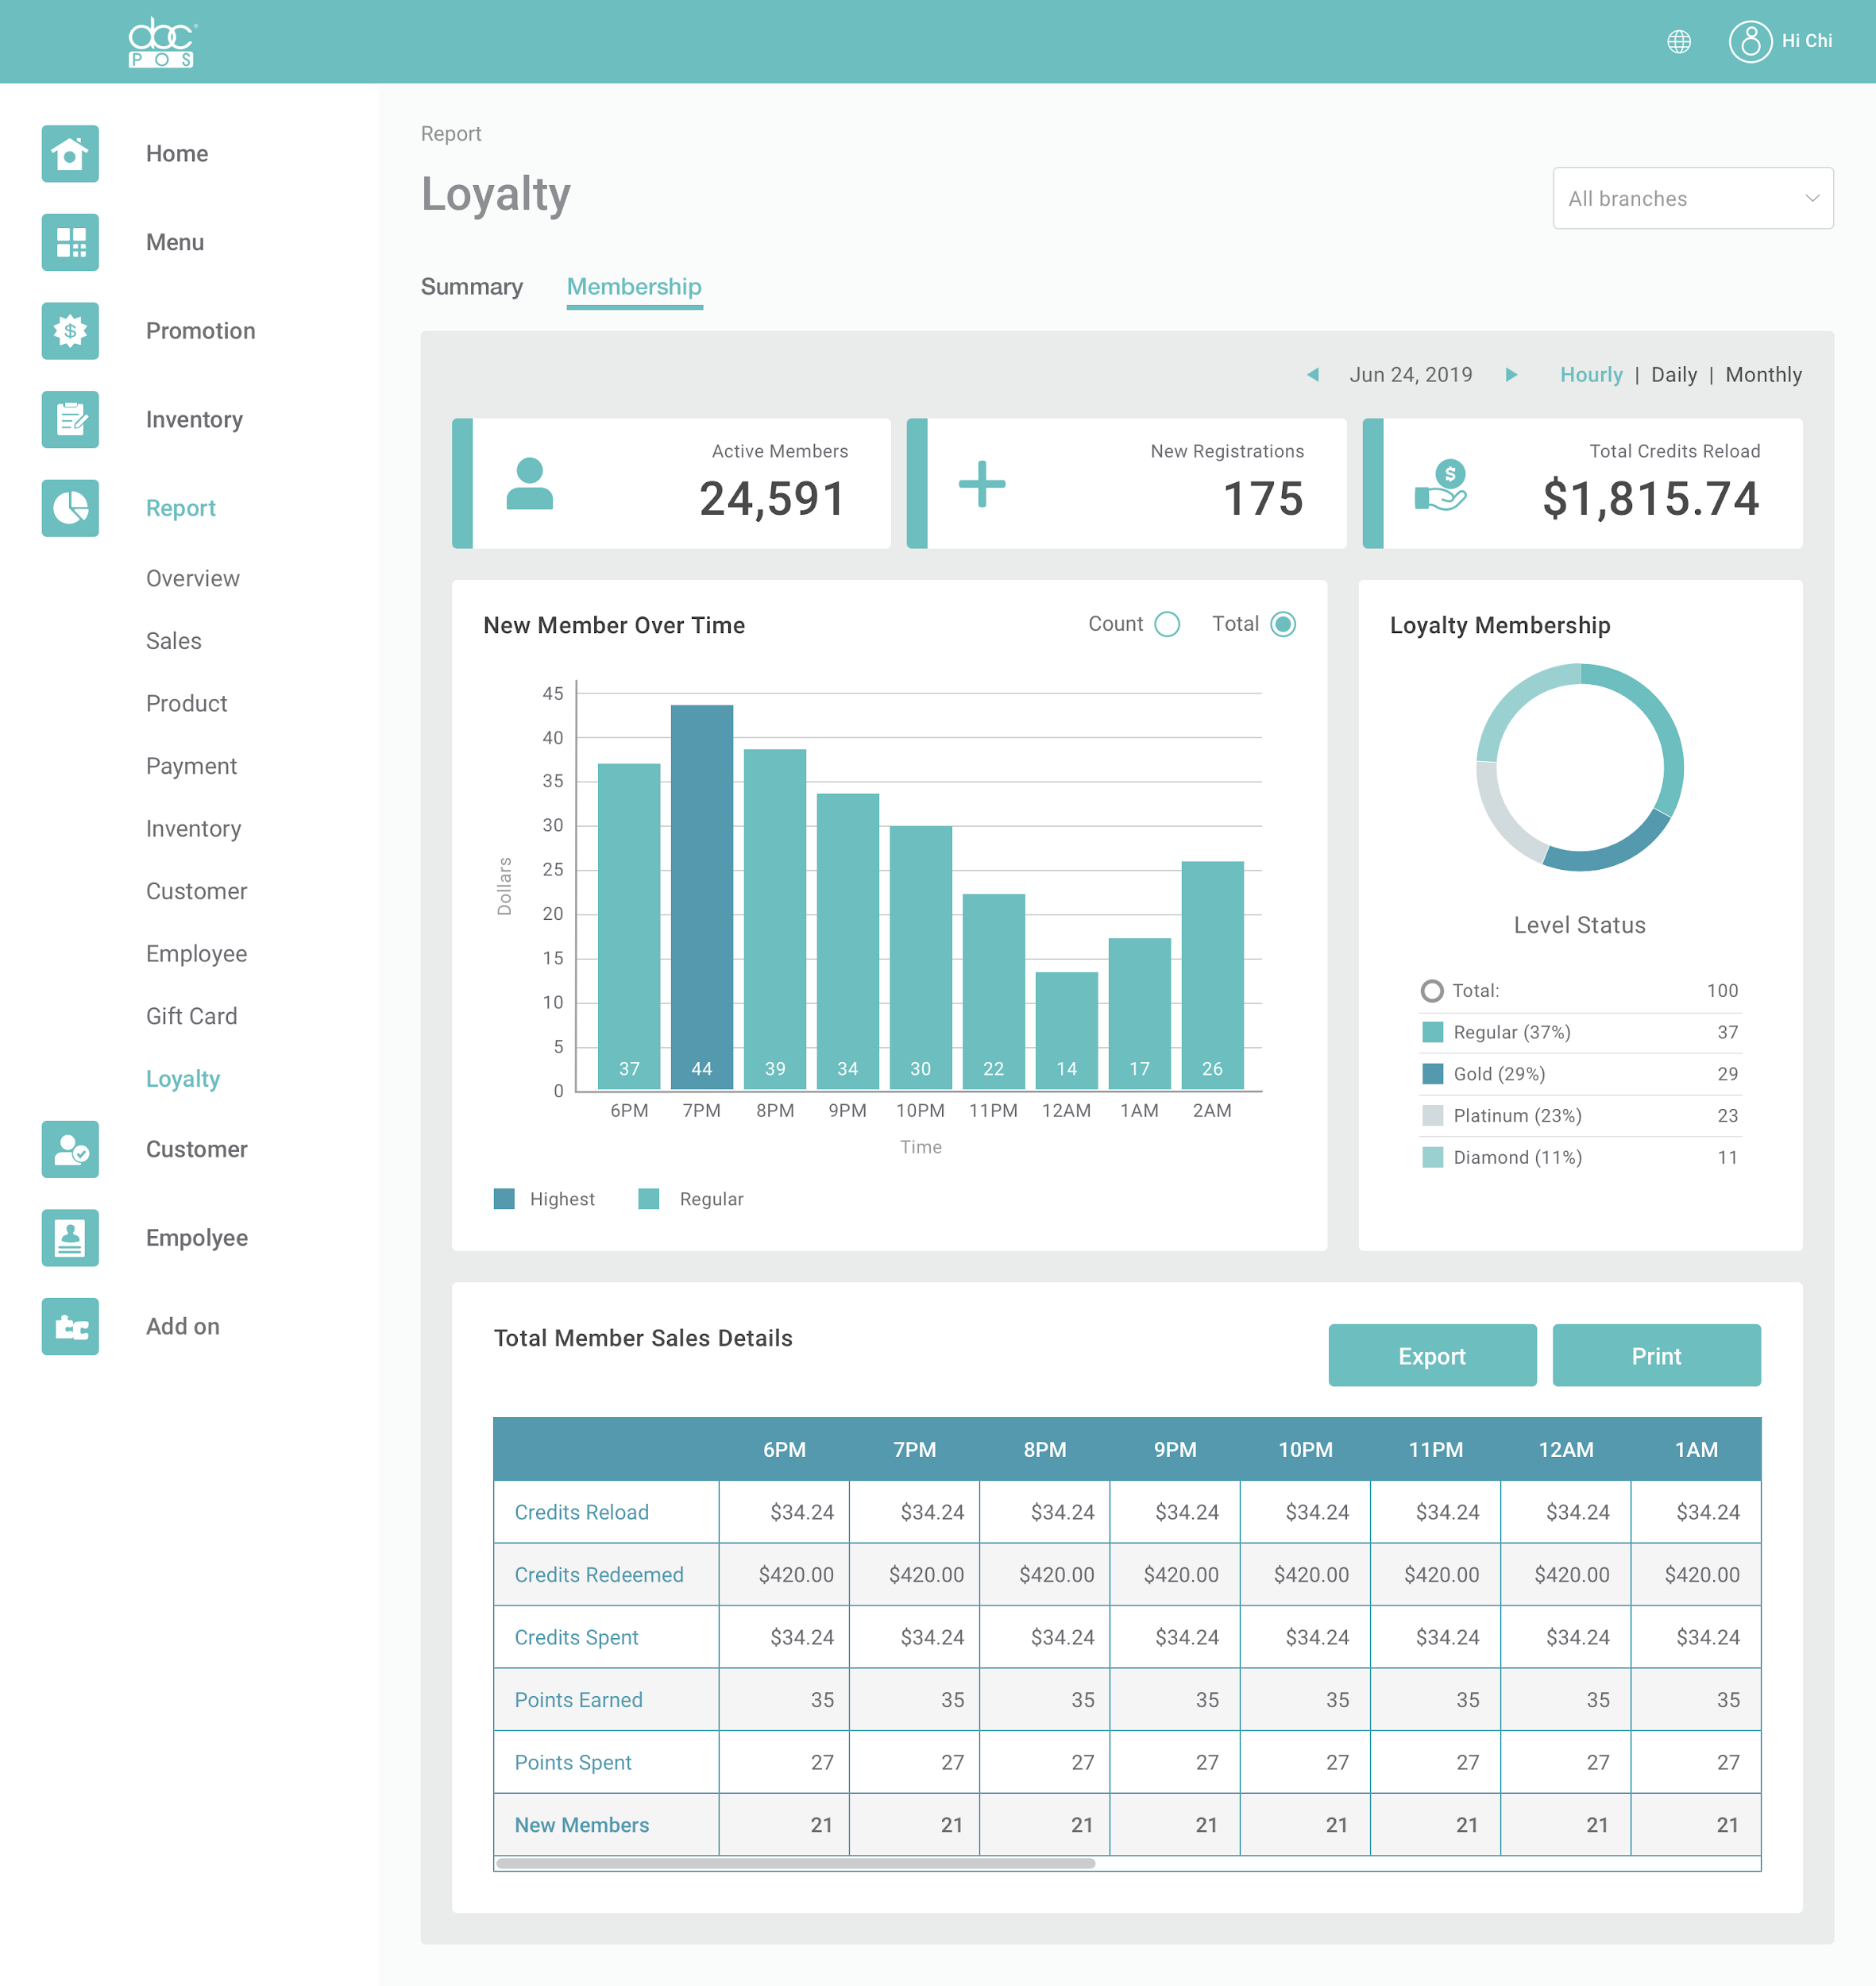
In the Loyalty Membership report, it shows very detailed information about the loyalty
transactions as well as the number of loyalty customers. It shows how the customers are
distributed in each loyalty level and detailed information about points and credits at the bottom.
4. View and edit customer Profiles
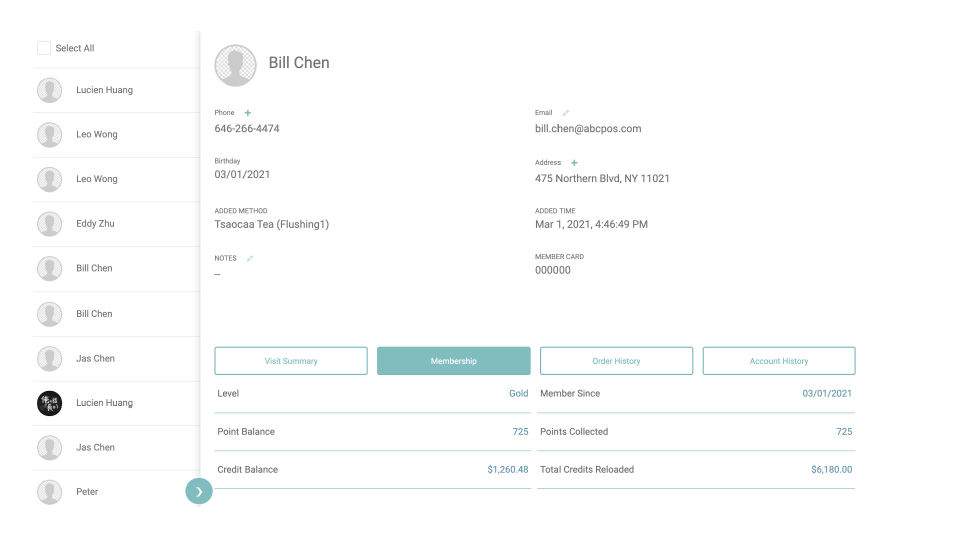
To view detailed membership information of a loyalty customer, go to “Customer
Profiles”. You can see the loyalty level of the customer, as well as their point balance, credit
balance, total points earned, and total credits reloaded. This information allows you to better
understand your customers’ order behaviors, and check their account history in order to
prohibit abusive usage.
We allow the restaurants to edit a customer’s phone number, email address, birthday,
and member card information on the Back Office. Therefore, the restaurants can manage their
customers better and can still respond to the customers needs while limiting permissions of a
customer or a front staff.